Windows Script Host Errors: Causes and How to Fix
Missing system files and corrupted data can cause Windows Script Host errors, preventing some applications and startup utilities from running. Let’s look at some ways to fix them.
It should be noted that an incorrect or poorly configured script file can trigger a script host error as well. Since such errors are rare and require no intervention from your end, we will focus on script host errors that prevent even valid scripts from running on your PC.
What Is the Windows Script Host? Is It Safe?
The Windows Script Host simply provides an environment for scripts to run. As such, most users are unlikely to ever come across its functionality, as it is primarily meant for automating administrative tasks with batch files.
Nevertheless, plenty of applications and services use Windows scripts to set things up, which requires the Script Host to run properly. There was a time when malicious scripts were also used as viruses, but Windows Defender has gotten good enough to detect and block such scripts.
What Causes Windows Script Host Errors?
Two main reasons for seeing a Windows Script Host error are faulty scripts or missing system files.
If the script trying to run has invalid commands or missing statements, it can throw a Windows Script Host error. Such errors are limited to the script in question and should not lead to errors with other applications and services.
However, the more problematic script host error is caused by corrupted or broken system files. This creates issues in running the script host itself, thus making all scripts unusable on your machine.
Now, figuring out why the system files have been corrupted is tricky. It can happen due to an aging hard drive, malware, or an improper system shutdown.
Fix 1: SFC and DISM
The best way to repair your system files and ensure nothing is missing is to run a DISM and SFC scan. Deployment Image Servicing and Management (DISM) is a command-line utility that repairs the local image of your Windows operating system with a fresh copy from Microsoft’s servers.
After that, the System File Checker (SFC) can go through your system files and replace any missing or corrupted files from this disk image. You can fix any problems with Windows system files with just these two commands.
- To repair the system files on your computer, first open Command Prompt as Administrator. You can do this by typing “cmd” in the Start Menu and clicking Run as Administrator.
- Start with a DISM command:
Dism /Online /Cleanup-Image /RestoreHealth
- This prompts DISM to download the system image from Microsoft, and then use it to repair the local image to full health.

- After DISM, it is time to run the SFC command. Type sfc /scannow and hit enter to scan the system files on your computer and replace any missing and corrupted files.

- Wait while SFC verifies every system file one by one, and do not close the window before the process is complete.

Fix 2: Use System Restore to Revert to an Earlier Configuration
If you suspect a recently installed application or update triggered the error, try using System Restore to revert your PC to its earlier state and bypass the problem. As it only affects system files, you don’t have to worry about losing your data.
System Restore can only take your system back to preset System Restore Points. While you can always create these points manually, Windows also creates restore points automatically before installing major updates. This gives you an easy way to roll back a problematic system change.
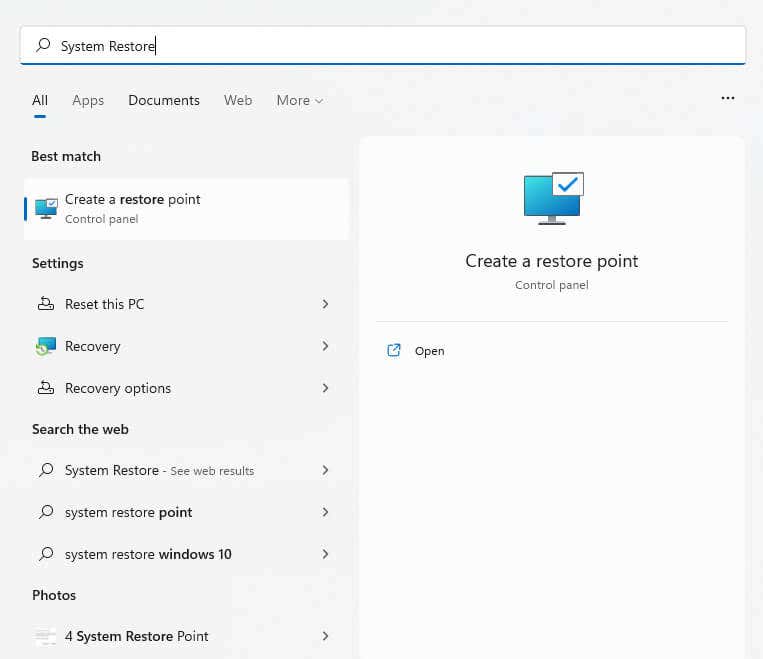
- To use System Restore, you must open System Properties from the Control Panel. But since the option can be tricky, it is easier to search for Create a restore point from the Start Menu.
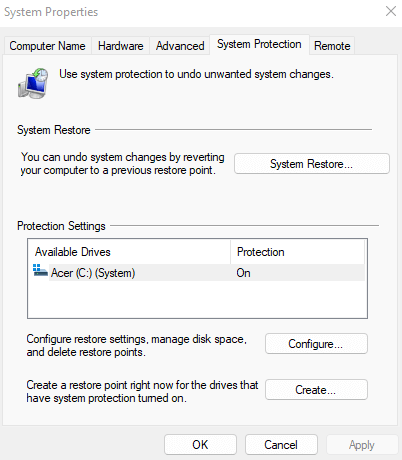
- This opens a new window allowing you to create or use restore points. Select the System Restore… button to take your PC back to an earlier restore point.
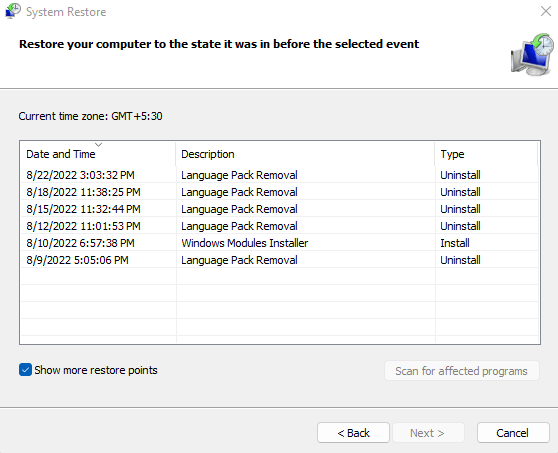
- The System Restore window will now appear, listing all the recent Restore points saved on your PC. To view older restore points, select the Show more restore points option.
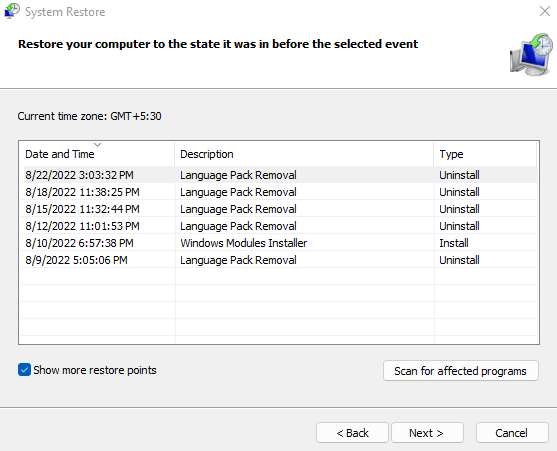
- You can find the date and time of creation of every restore point, letting you choose exactly how far back to take your system. The relevant update is also mentioned for the restore points created automatically by Windows. Select the System Restore point you want to revert to and hit Next.
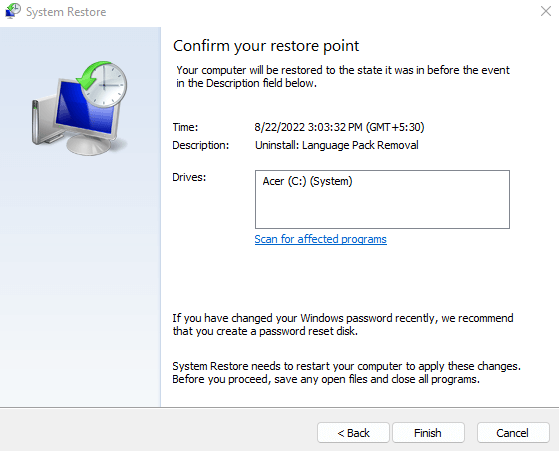
- Confirm the restore point again, and select Finish to start the process. Your computer will restart, restoring the system files to their older configuration.
Fix 3: Reset Windows
An SFC scan can fix any corrupt or broken system files. But in case that hasn’t worked out for you, there is always the option to reinstall the OS itself.
Don’t worry; we are not discussing a fresh installation that removes your files and personal data. You can easily reset Windows instead, keeping your files while ensuring that the entirety of the operating system is reinstalled and reconfigured. This works on both Windows 11 and Windows 10.
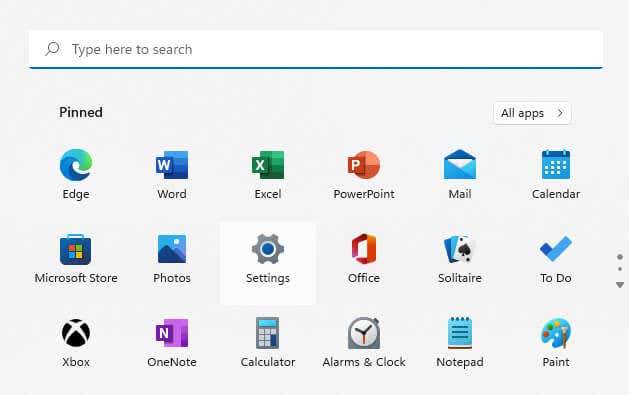
- To reset Windows on your PC, begin by opening Settings. Simply click on its gear icon in the Start menu.
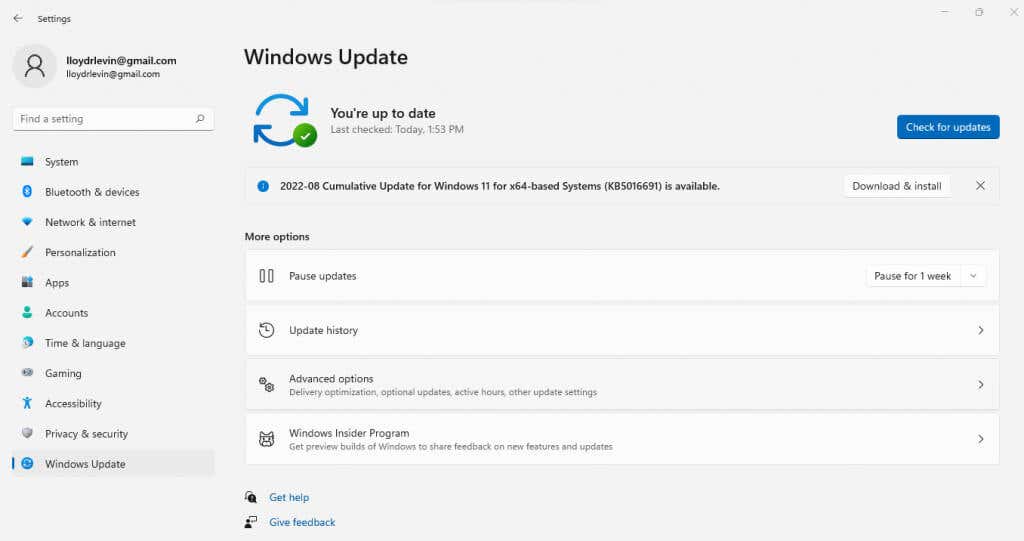
- Select the Windows Update tab (usually the last one on the left) and then go for Advanced options.
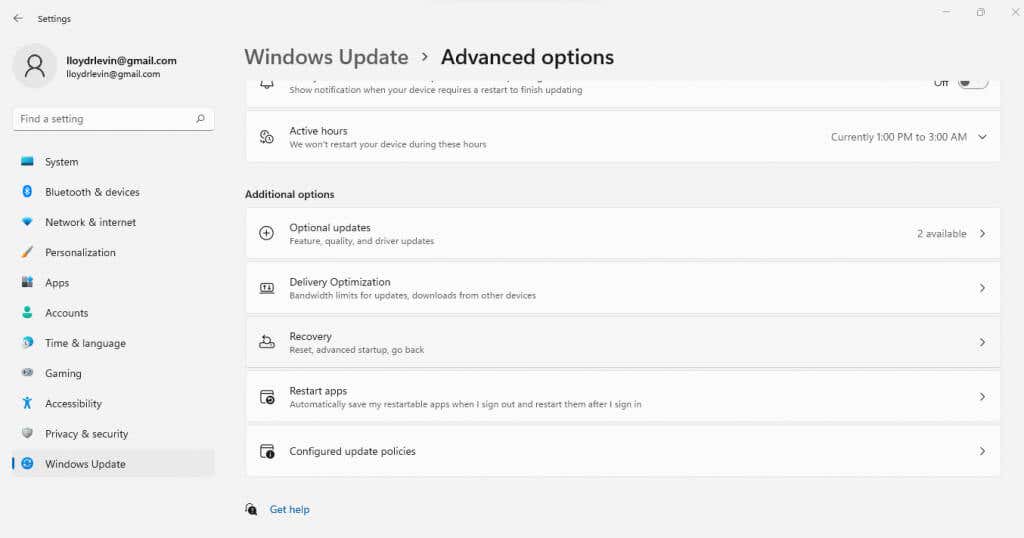
- For the most part, Advanced options include settings related to Windows updates, letting you manage exactly how and when updates are installed on your computer. But what we need to reset Windows is Recovery.
- You will now see a Reset PC option. Click on this button.
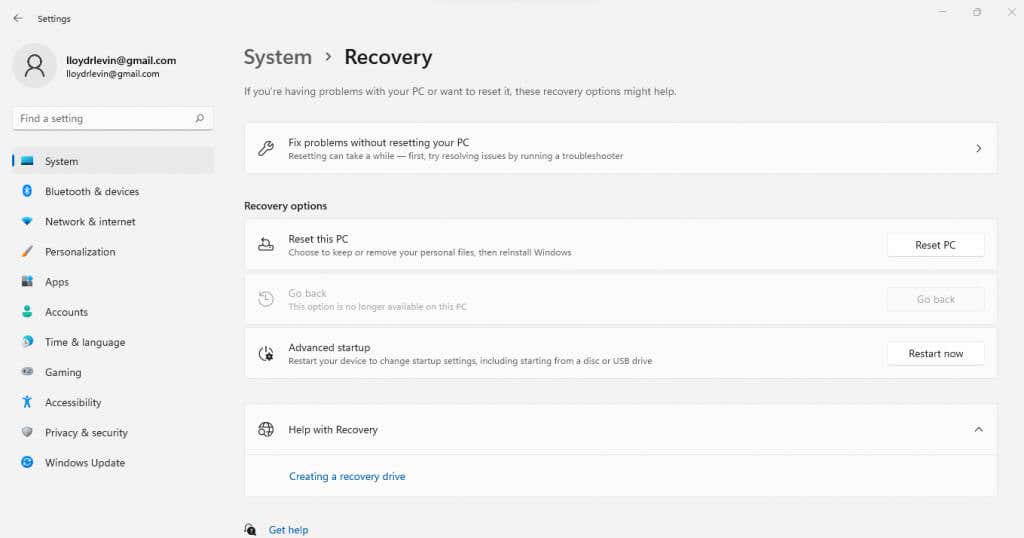
- A new window will open to start the process. This is where you can keep your files by choosing the first option.
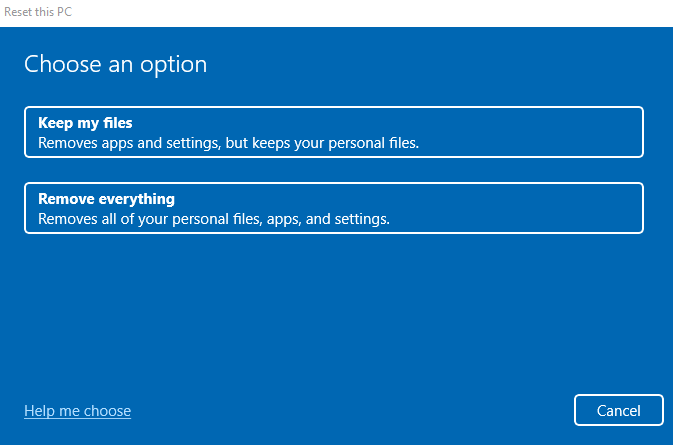
- The second option is to pick the source of the installation files. Unless you have some installation media prepped (for instance, a bootable USB stick), choose the Cloud download option. Even when you have a local installation media, the Cloud Download is preferred as it ensures the latest, uncorrupted version of Windows is downloaded from Microsoft’s servers.
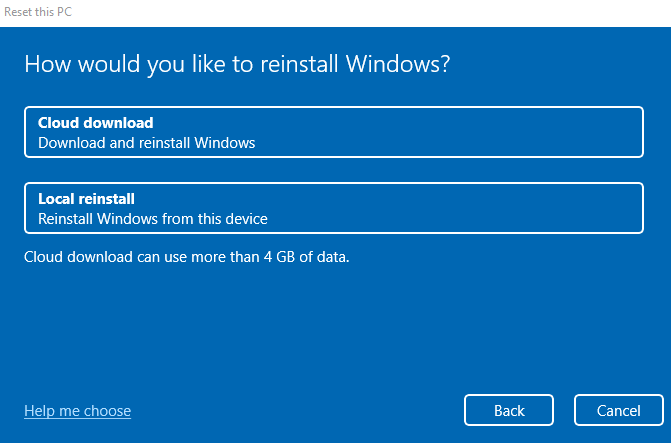
- Go over everything one last time and select Reset to confirm. Windows will now be reset on your computer.
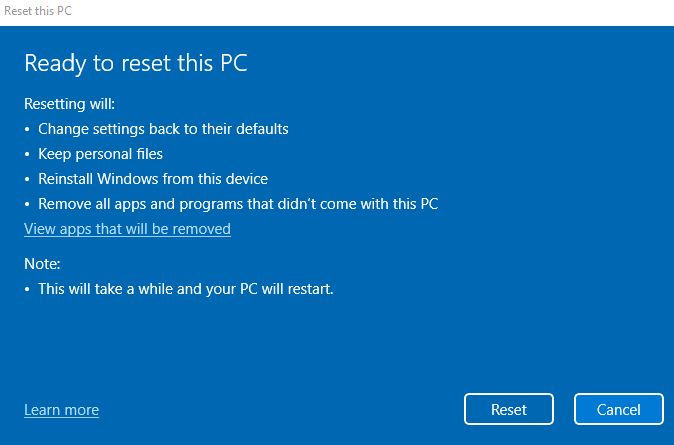
Now, you just have to wait while the installation progresses. Your computer might restart several times, so make sure to maintain an uninterrupted power supply for your PC or laptop.
What About an Antivirus Scan?
Skip the extra antivirus scans. They only catch malware, not fix Script Host errors. Windows Defender, already on by default, is enough. It can easily detect and block malicious code from accessing your system files, preventing Script Host errors.
Remember, antivirus programs can only isolate and delete viruses. You will still need a different method to get your OS working properly again.
Should You Try Registry Edits?
Many online guides recommend a variety of registry edits to fix the Windows Script Host error. Some ask you to turn the script host on or off through the registry, while others take a different approach by adding a .vbs key or changing its value. Yet another approach is to delete registry entries after the Userinit.exe, forcing the system to reconfigure its startup process.
But meddling in the registry is an easy way to break things, making it a double-edged sword. Most of these registry fixes are unnecessary anyway; simply repairing your system files or rolling back updates automatically does the job. So, avoid changing the registry for a script host error.
What Is the Best Way to Fix Windows Script Host Errors?
Running a DISM and an SFC scan is the best way to repair your system files and is the recommended action for issues like a Windows Script Host error. Failing that, a System Restore can rewind your system back to its working state.
When these methods don’t work, reset Windows. You can keep your files and data while reinstalling the OS. You will need to reinstall apps, any lingering system issue will be fixed.
Source : Windows Script Host Errors: Causes and How to Fix

Comments
Post a Comment