How to Fix an AMDRSServ.exe System Error on Windows 11/10
Getting an “AMDRSServ.exe – System Error” message on your Microsoft Windows PC? Your installed AMD drivers may be corrupted, or your Windows system files may be damaged. Various items can cause your PC to display this error. Fortunately, you have a few easy ways to fix this problem and use your Windows 11 or Windows 10 computer normally.
Windows displays the above error for various reasons, including your installed drivers being faulty, your driver update causing the problem, and more.
Roll Back Your AMD Drivers Update
If you started getting the above error after updating your AMD drivers, that driver update may be the culprit. Sometimes, you receive faulty driver updates, causing various issues on your PC.
In this case, you can roll back your driver update to fix your issue. You’ll have to boot your PC in Windows’ safe mode to uninstall the driver update if your PC doesn’t work in normal mode.
- Right-click your Start menu icon and select Device Manager.
- Expand your AMD device category, select your graphics card (GPU) or another device, and choose Properties.
- Access the Driver tab on the Properties window.
- Select Roll Back Driver to uninstall your driver update.
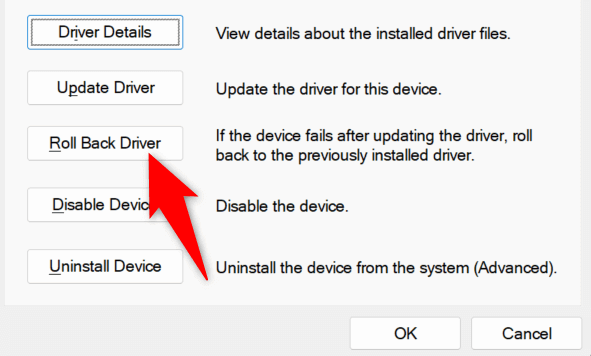
- Choose the reason you’re downgrading your driver and select Yes.
- Wait while Device Manager uninstalls your driver update.
- Reboot your PC.
Rename the Executable File That Displays an “AMDRSServ.exe – System Error” Error
One way to resolve the above AMD error is to rename the file that displays the error. You can rename your app or game file that’s causing the above error to potentially fix your issue.
- Right-click your app or game’s EXE file that displayed the above error.
- Choose Rename in the context menu.
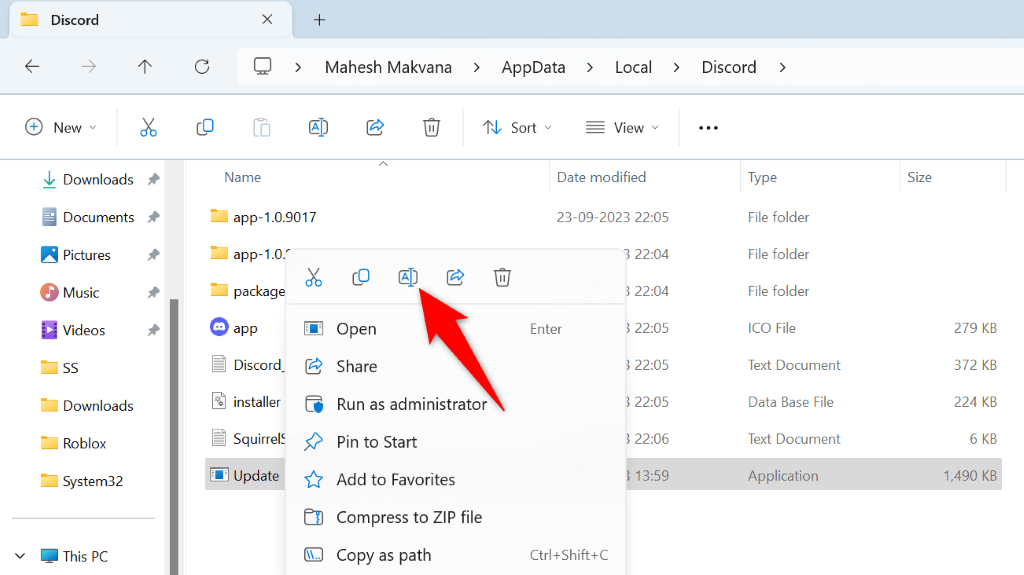
- Type a new name for your file and press Enter. Make sure not to change the file extension, as doing so will make your file unusable.
- Launch your renamed file.
Reinstall AMD Drivers to Fix AMDRSServ Error
One surefire way to fix your system error is to remove and reinstall your AMD drivers. Doing so fixes all the faulty driver files, allowing you to get rid of your error.
You’ll have to update your Windows version and delete the existing installed drivers before you can install fresh AMD drivers.
Step 1: Update Your Windows Operating System
Newer drivers often require the latest Windows version, and your PC must be running that to install the latest drivers without issues. It’s easy to update your Windows 11 or Windows 10 system, and we’ll show you how.
Update Windows 11
- Launch Settings using Windows + I.
- Select Windows Update in the left sidebar.
- Choose Check for updates on the right pane.
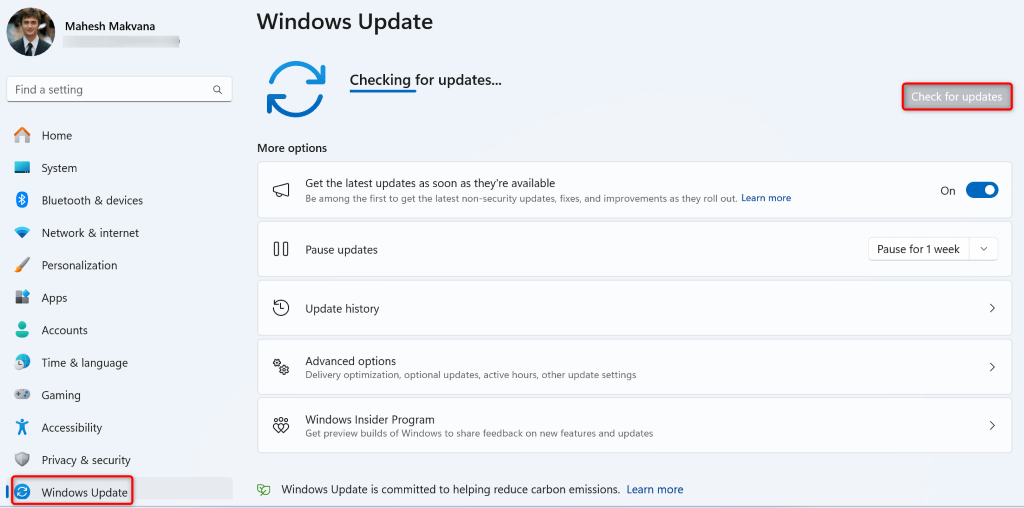
- Download and install the available updates, including optional updates.
Update Windows 10
- Open Settings by pressing Windows + I.
- Select Update & Security in Settings.
- Choose Windows Update in the left sidebar.
- Select Check for updates on the right pane.
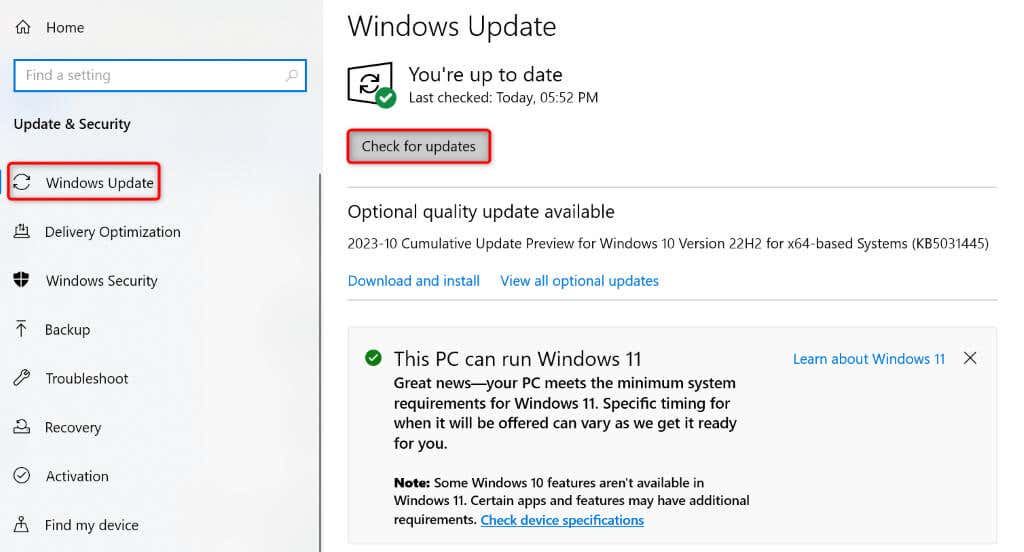
- Download and install the displayed updates, including optional ones.
Give your PC a reboot after updating your Windows version.
Step 2: Remove the Existing AMD Drivers From Your Windows PC
After updating Windows, delete the existing AMD drivers installed on your PC. This ensures any faulty files are removed before you install fresh drivers.
- Boot your Windows PC in safe mode with networking.
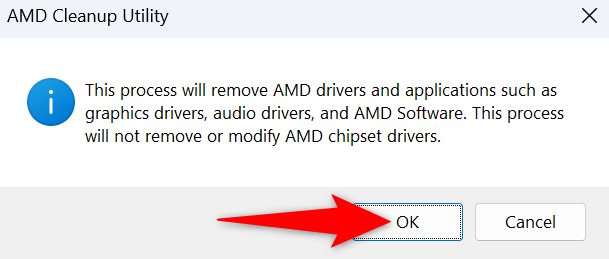
- Download and run the AMD Cleanup Utility. This tool helps you remove all the AMD drivers from your PC.
- Select OK in the tool’s prompt to begin removing your installed drivers.
- Wait for the tool to delete your drivers.
- Select Finish when the tool has finished the job.
- Restart your PC in safe mode.
Step 3: Reinstall Fresh AMD Drivers on Your Windows PC
Now that your existing AMD drivers are gone, install the latest and fresh drivers on your PC.
- Open a web browser on your PC and head to the AMD Drivers and Support site.
- Select Download Windows Drivers on the site.

- Launch the downloaded file and install the available drivers.
- Restart your PC after installing the drivers.
Fix Windows’ Corrupted System Files
If removing and reinstalling the drivers didn’t fix your issue, your core Windows system files may be corrupted. This corruption can cause various problems on your machine, including the one you’re experiencing.
Luckily, you don’t have to reinstall Windows to fix your system’s damaged files. You can use a built-in utility called SFC (System File Checker) to find and fix all the damaged files on your system. This utility automatically finds the faulty files and replaces those files with working ones.
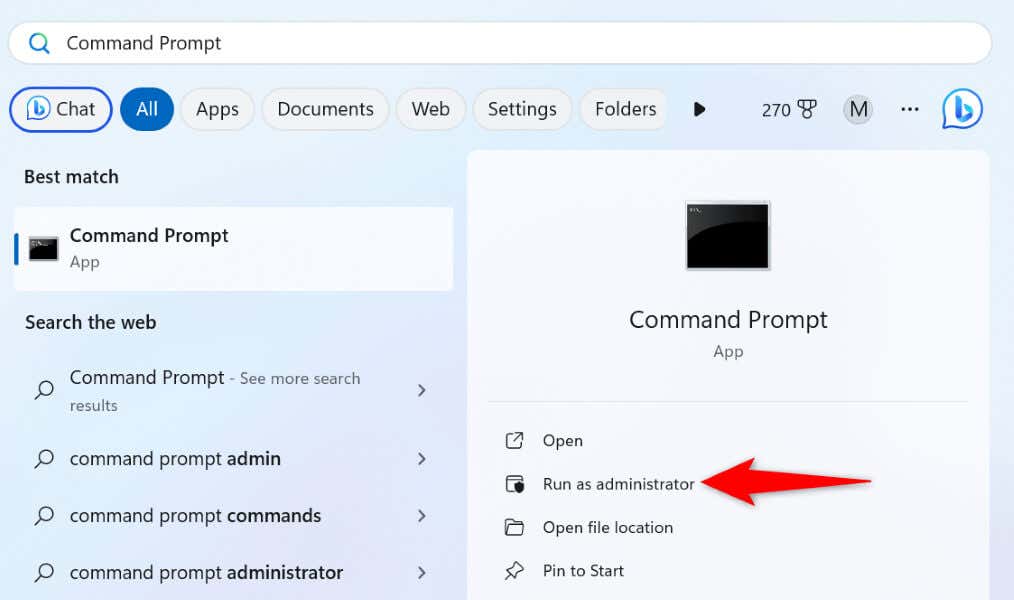
- Open the Start menu, find Command Prompt, and select Run as administrator.
- Choose Yes in the User Account Control prompt.
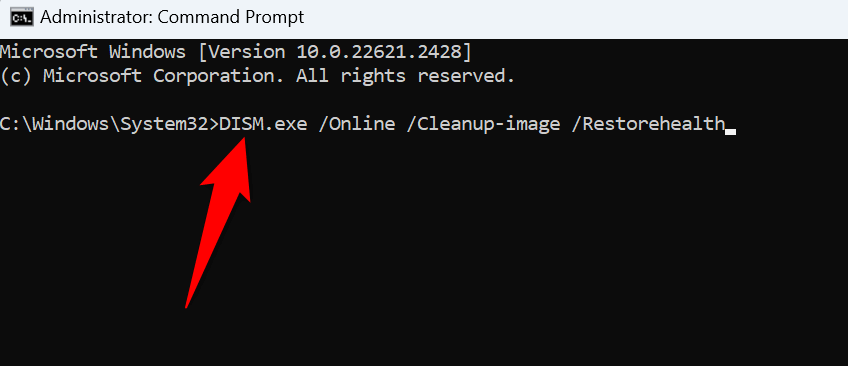
- Type the following command on the CMD window and press Enter. This command downloads the files required to fix your system’s corrupted files.
DISM.exe /Online /Cleanup-image /Restorehealth
- Next up, use the following command to find and fix your system’s bad files:
sfc /scannow - Reboot your PC after fixing the corrupted files.
Troubleshooting an AMDRSServ.exe System Error on Windows 11/10
If you have suddenly run into an AMD system error and can’t figure out how to fix the problem, the guide above is all you need. Hopefully, it has helped you resolve the error.
Source : How to Fix an AMDRSServ.exe System Error on Windows 11/10
Comments
Post a Comment