How to Make Flashcards in Microsoft Word
Creating flashcards is an excellent way to study and learn new information. They’re typically used for information that is easily read, reviewed, and (hopefully) retained.
While you could do this manually, Microsoft Word documents can be customized to create your own flashcards that cater to your specific needs. This will help you create engaging study materials you can create, modify, and share with others.
If you want to know how to make flashcards in Microsoft Word, follow the steps below.
What Are Flashcards?
Flashcards are a learning tool that’s designed to help you memorize and understand facts and concepts. They typically have two sides—one displaying the question or term and the other revealing the answer or definition. This helps learners practice recalling information on their own.
Flashcards are versatile—they can be used for studying any fact or subject. If you don’t want to write them yourself, you can use Word to create and customize your learning aids. The biggest benefit of using Word to create flashcards is that making digital flashcards allows you to adjust and update your information easily.
You can create flashcards that are visually appealing and easy to understand in Word that retain the crucial information needed for effective learning. Just remember to keep them simple—the aim is to make the information easy to digest, so the more you break down a topic, the easier it’ll be to remember.
How to Create a Flashcard in Word
You can easily create a flashcard in Word but must adjust your page layout. The best way to do it is to change your page layout and orientation to make it easier to print your flashcards onto suitable pages (typically 4 by 6 inches).
If you’re looking to create flashcards in Word, the same options are available in a retail copy of Office as well as for Microsoft 365 subscribers.
To create flashcards in Microsoft Word:
- Open Word and create a new document.
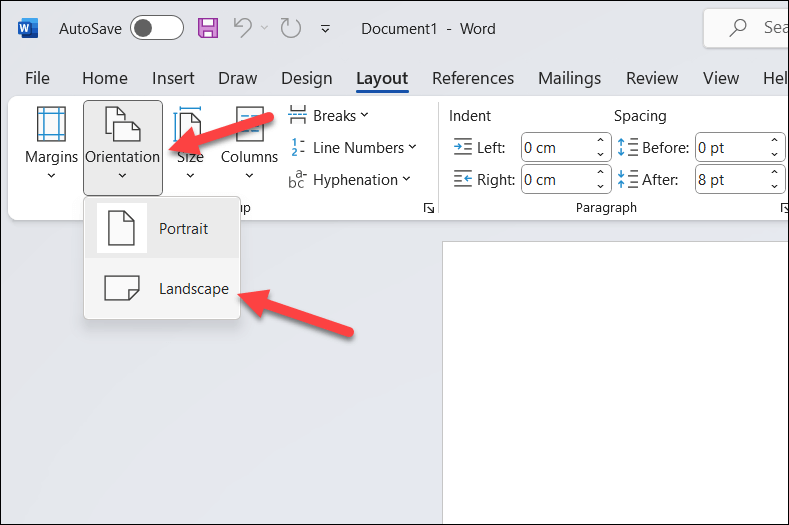
- Press the Layout tab and select Orientation > Landscape. This will change the orientation of your document to better fit the flashcard format.
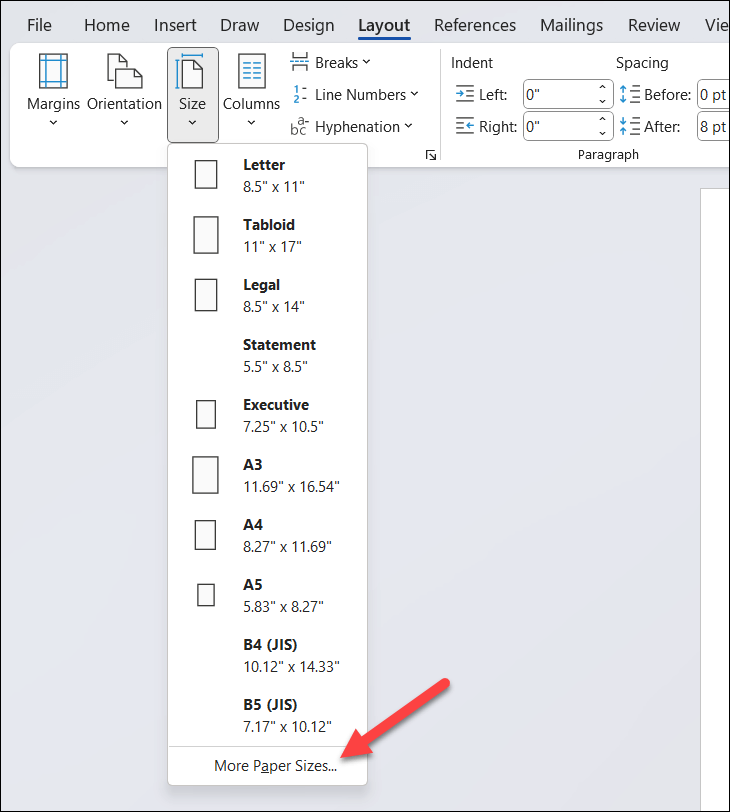
- In Layout > Size, choose the 4″ x 6″ paper size—this is an ideal size for printing flashcards. If this paper size isn’t visible, press More Paper Sizes at the bottom.
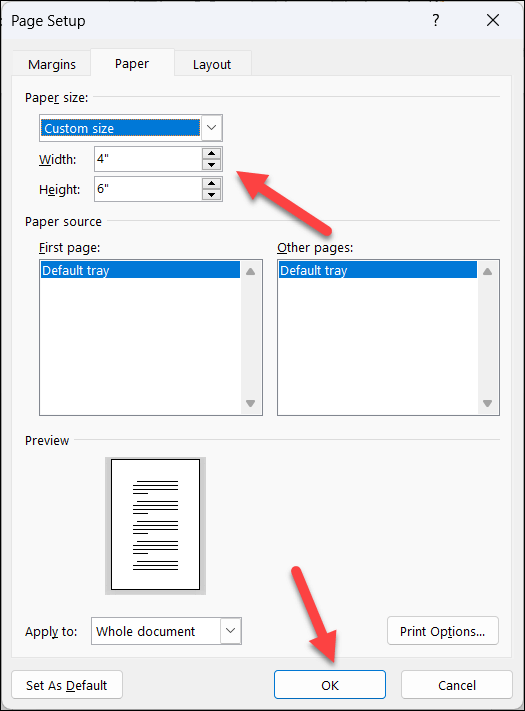
- In Page Setup, select Paper > Custom size and set Width to 4″ and Height to 6″.
- Press OK to save.
- Now that your document is set up, you can begin creating your flashcards. To create basic flashcards using each page, set the text formatting to make the text large enough, then type your information on each page. You can bold, underline, or italicize text for emphasis, as needed.
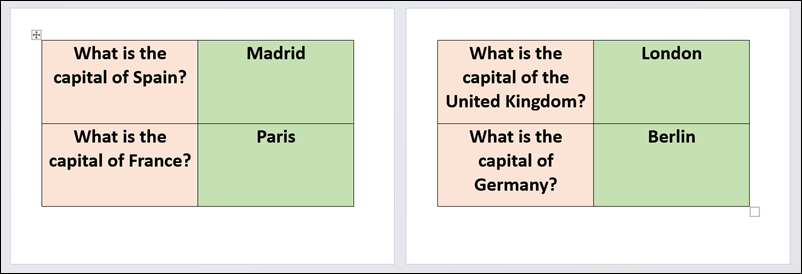
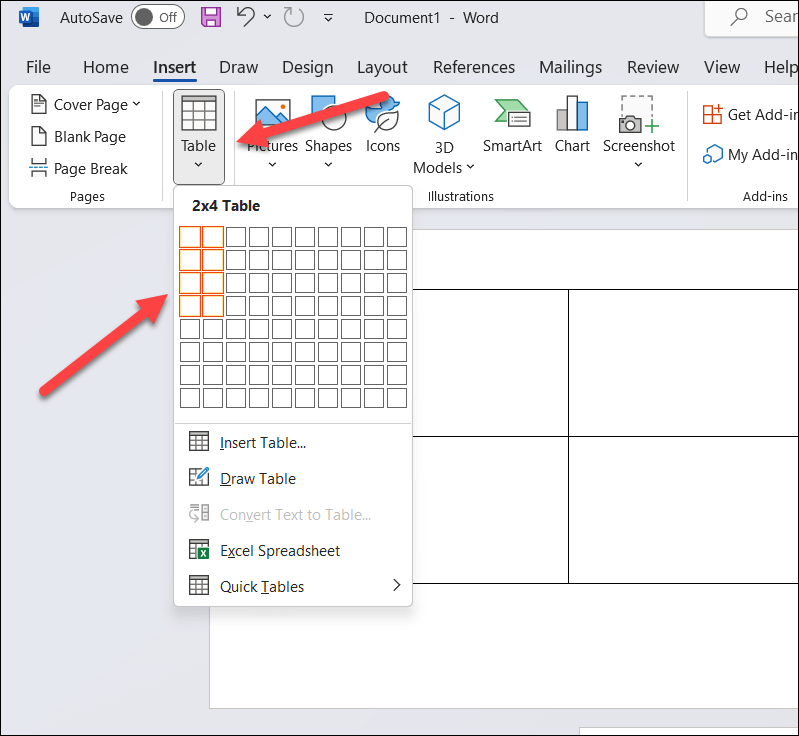
- If you wish to create multiple flashcards on the same document, press Insert > Table to insert a table with two columns and multiple rows. This will ensure that your flashcards are organized and easy to cut out (if you decide to print them).
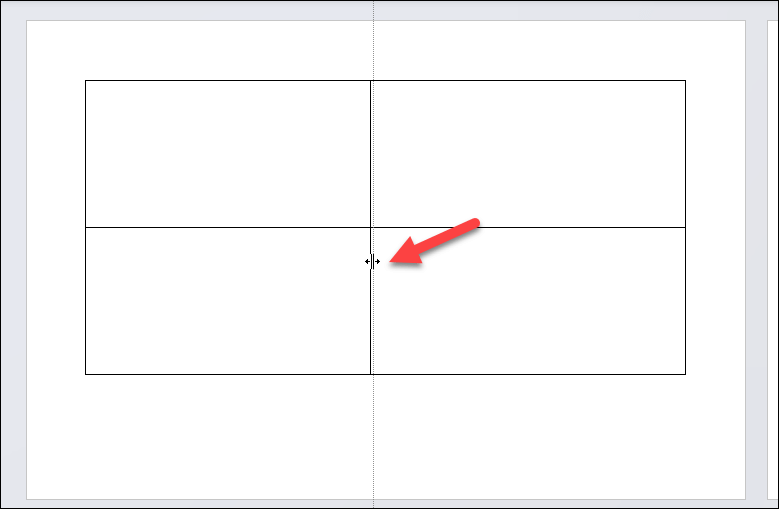
- If you need to resize the table, hover over a border and begin to drag it with your mouse to place it in the correct position.
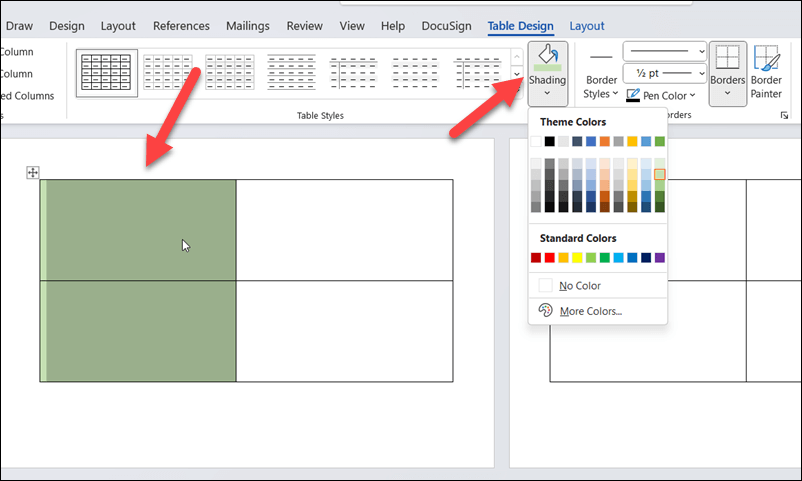
- You could also consider color-coding your tables by concept, idea, or term, or by coding them into question-and-answer pairs. This can help with memory association, making it easier to sort and locate specific flashcards. To do this, select a column in your table, then press Table Design > Shading and select a color.
- Once you’ve formatted your tables, type in the content into each cell. You can further adjust the text formatting and color afterward.
How to Print Flashcards in Word
Once you’ve created your flashcards in Microsoft Word, the next step is to print them out and cut them.
To print flashcards in Word:
- Open your flashcard document in Microsoft Word and make sure that the content is properly formatted.
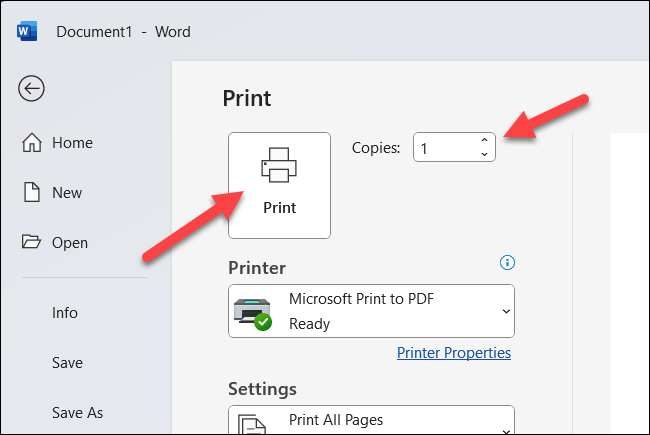
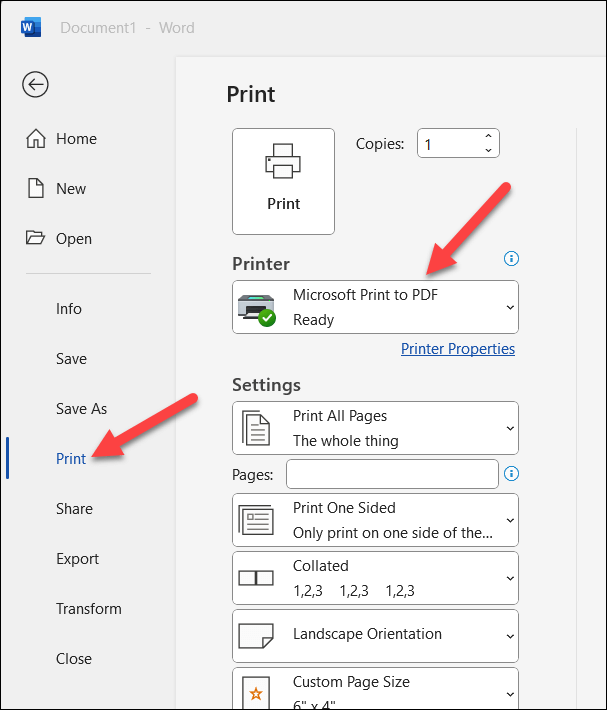
- Next, press File > Print to open your printer settings menu.
- Choose your preferred printer from the Printer drop-down menu.
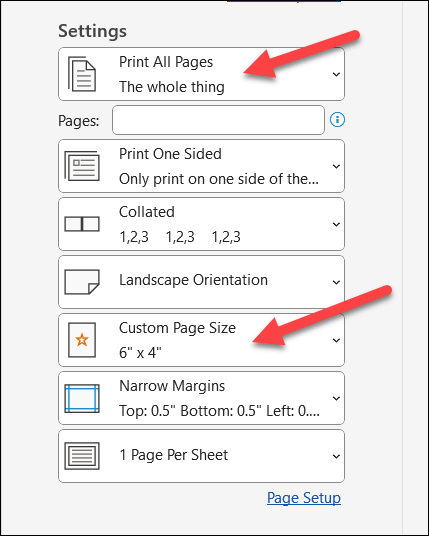
- In the Settings section, make sure that the options for page sizing, page orientation, margin sizing, and the number of pages to print are all correct.
- Select how many copies you want to print from the Copies box at the top of the menu before pressing Print.
After printing your flashcards, you must cut them up using scissors or a paper trimmer. You can use the table borders (if you have them enabled) as a guide to help you do this.
Learning With Microsoft Word
Creating flashcards in Word can be a great way to boost your learning if you’re trying to learn complex topics. These easy-to-create learning aids require little effort and can be easily customized to suit different topics.
If you want to use your flashcards in other environments, try and convert your Word document to a JPEG image. This’ll allow you to import the flashcards into an image editing tool for further improvements.
Having trouble with Word not responding? Don’t forget to keep saving your documents and store a backup in cloud storage, just in case you lose your work.
Source : Help Desk Geek


Comments
Post a Comment