How to See When a Microsoft Word Document Was Created Or Modified in Windows
Microsoft Word records the date (and time) you create, edit, print, or save a Word document. These data are digitally embedded in the document, and you can access them in the Microsoft Word app or Windows File Explorer.
We’ll show you how to see when a Word document was created or modified. You’ll also learn to insert the creation or modification date in the Word document.
Check Word Document Creation Date in Microsoft Word
The steps below apply to Microsoft Office 365, Microsoft Word 2016, and newer versions. See Viewing the Date a Word Document was Last Modified if you use an older version of Word.
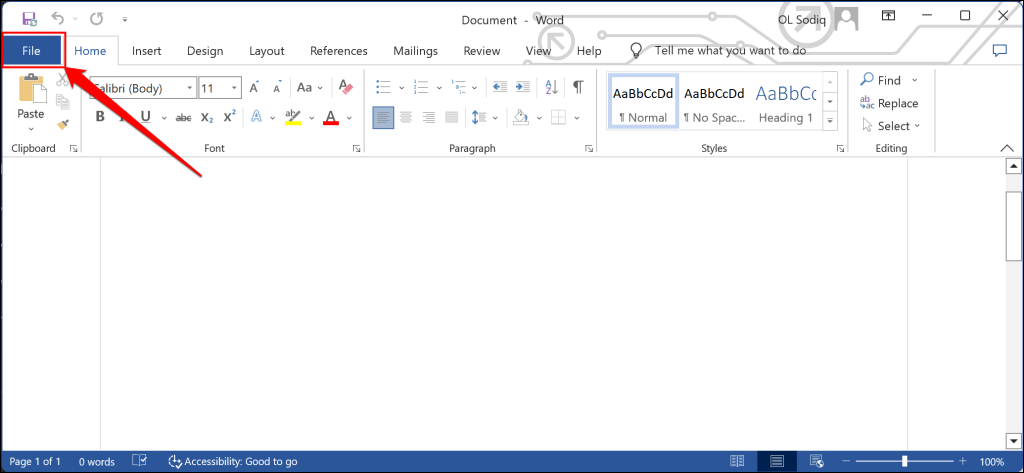
- Open the document in Microsoft Word and select the File menu in the top-left corner.
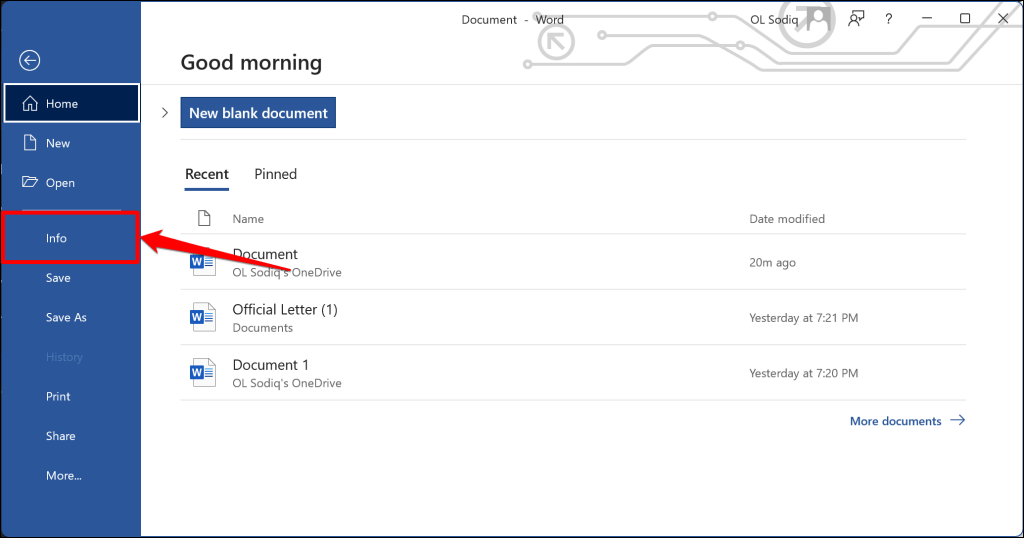
- Select Info on the sidebar.
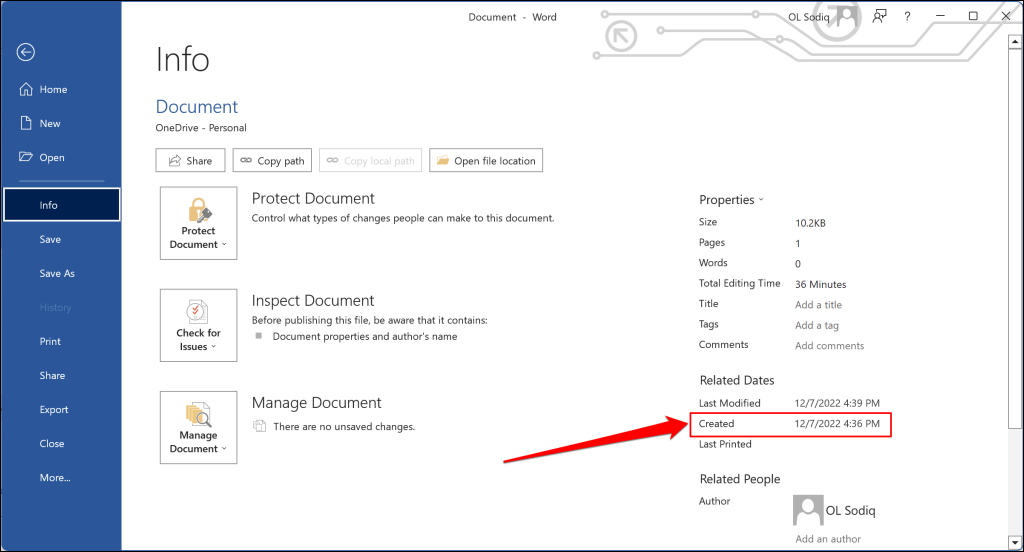
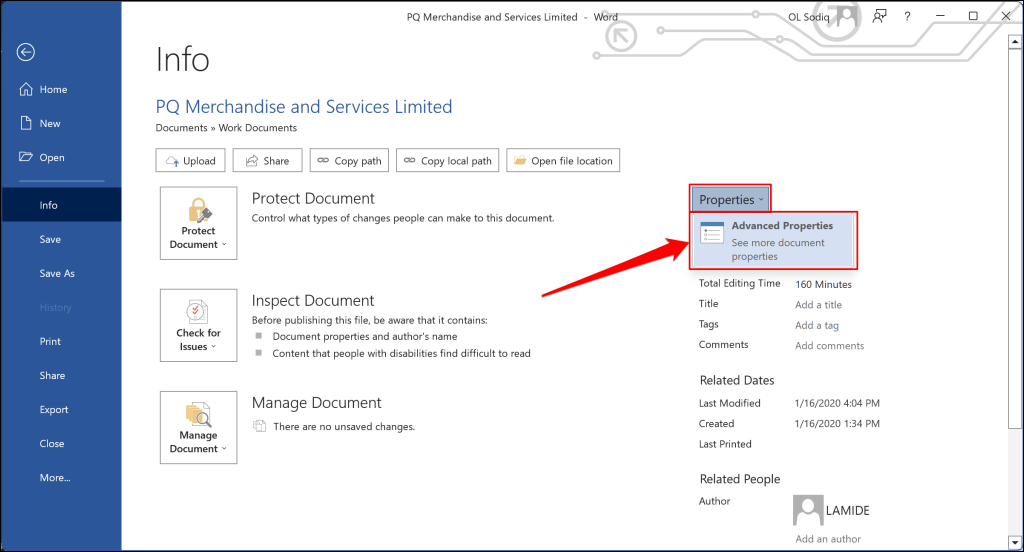
- Check the Created row in the “Related Dates” section to see when the document was created in Microsoft Word.
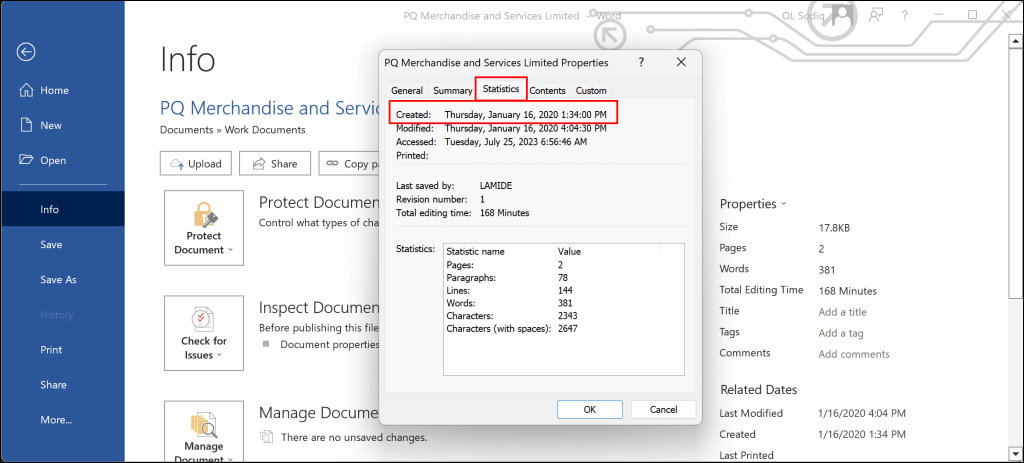
You can also check the document creation date in the “Advanced Properties” window. Open the Properties drop-down menu and select Advanced Properties.
Open the Statistics tab and check the “Created” row to see the document’s creation date. Select OK or Cancel to close the Advanced Properties window.
Check Word Document Creation Date via File Explorer
You can check the creation date of Word documents using Windows File Explorer. Use this method if you don’t have Microsoft Word installed on your computer.
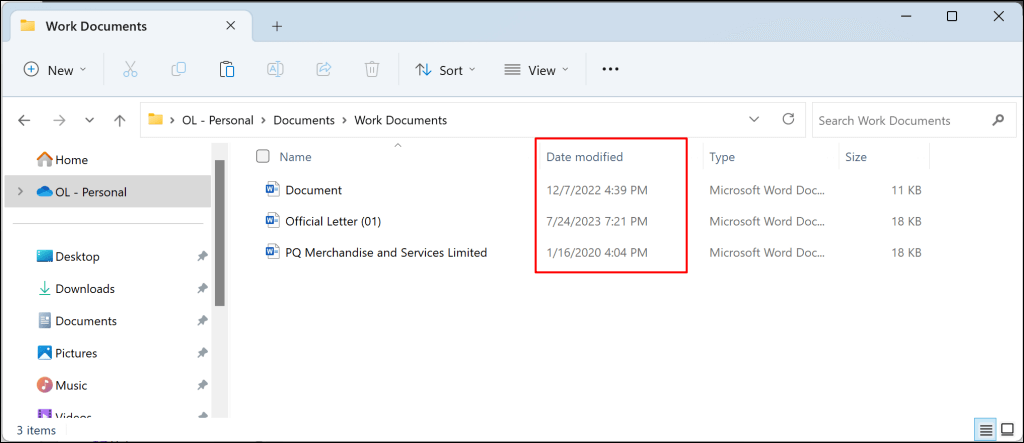
- Open File Explorer (Windows key + E) and navigate to the path/location of the Word document.
- Check the Date modified column to see when the document was last edited in Microsoft Word.
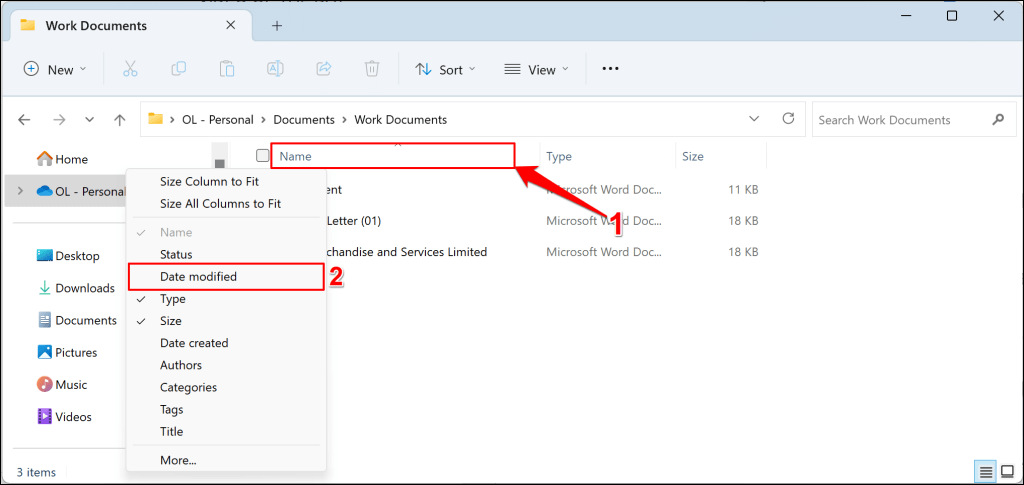
If you don’t see the “Date modified” column, right-click the Name header, and select Date modified.
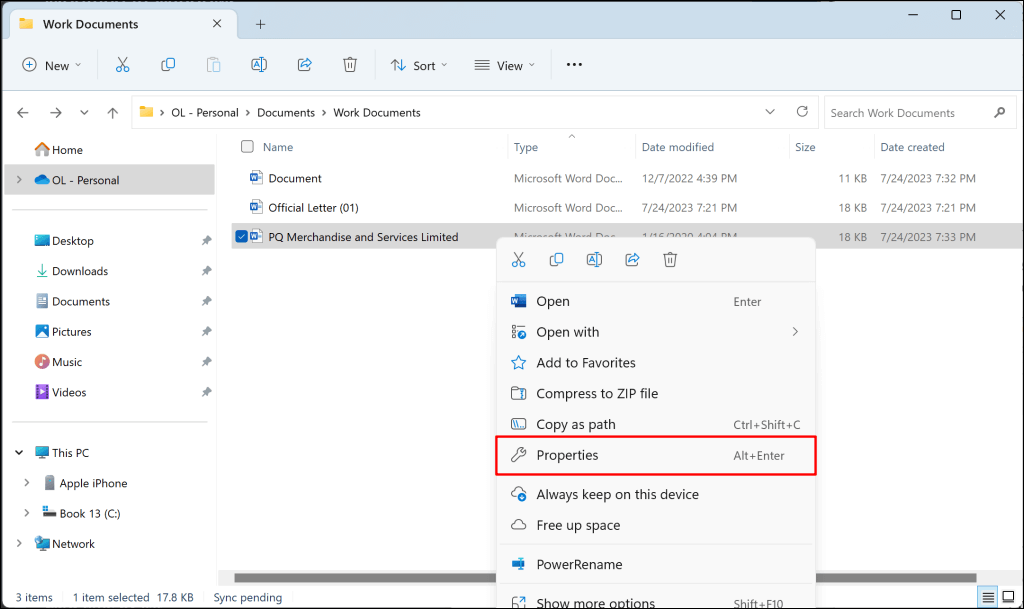
- To see the exact date a Word document was created, right-click the document and select Properties. Alternatively, select the document and press Alt + Enter on your keyboard.
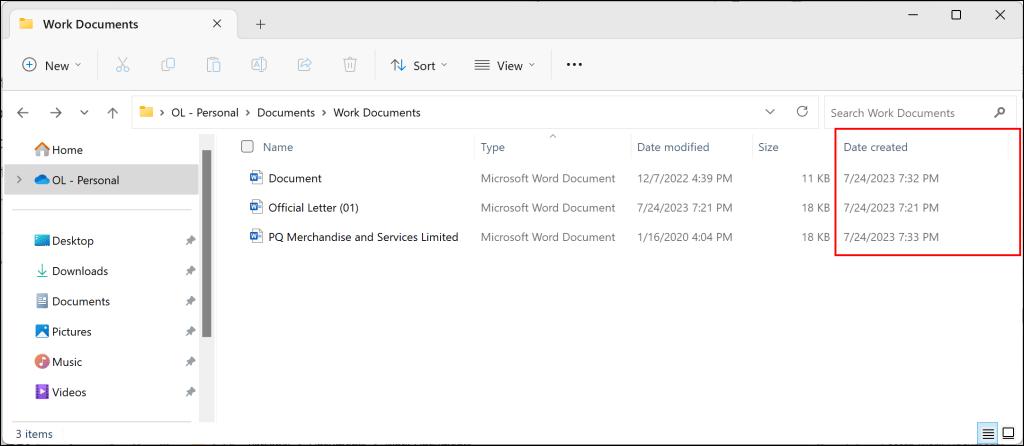
You might see a Date created column in the folder. The information in the column describes when the document was saved/downloaded to your computer. Proceed to step #4 to see when documents were first created in Microsoft Word.
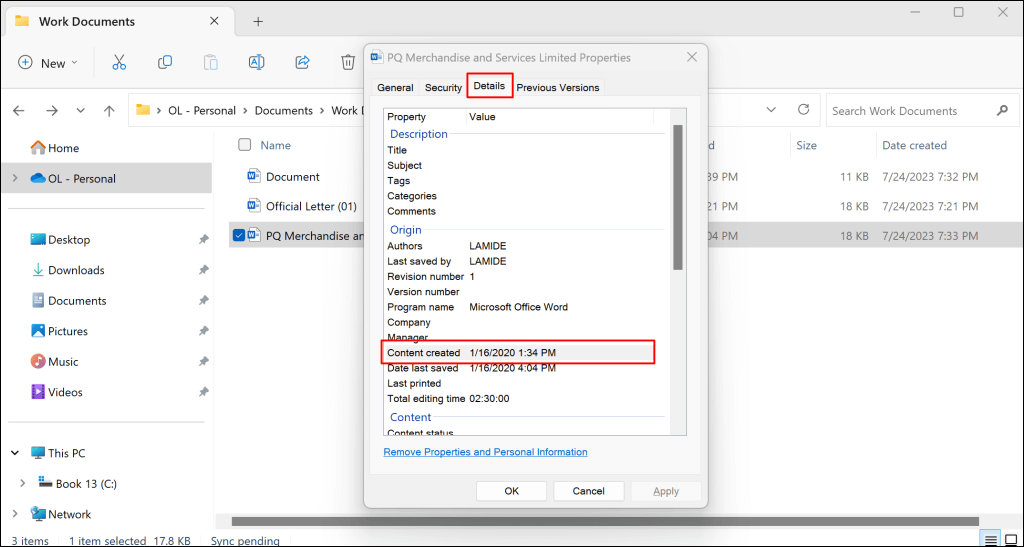
- Head to the Details tab and scroll to the “Origin” section. Check the Content created row to see when the document was created in Word.
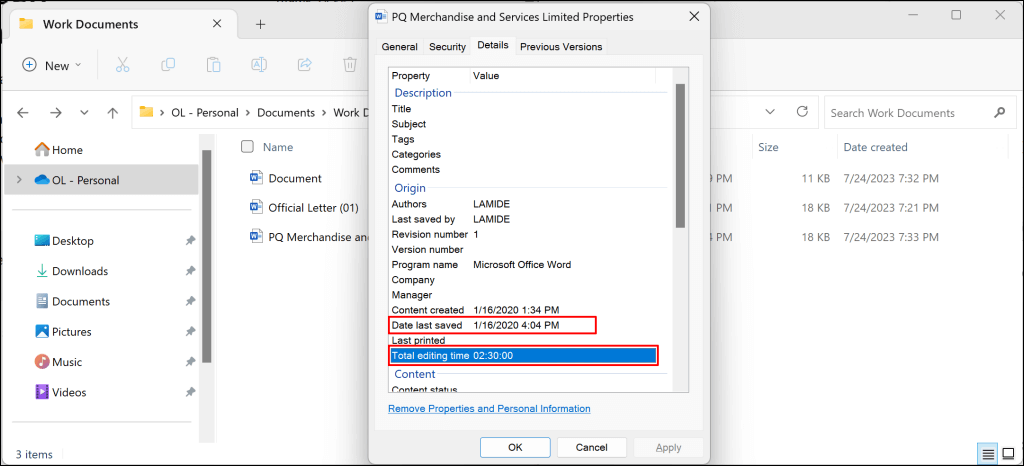
You can also see when the document was last modified/edited in the Date last saved row. The Total editing time row shows how long the author took to make changes to the document.
Check Document Modification Date in Microsoft Word
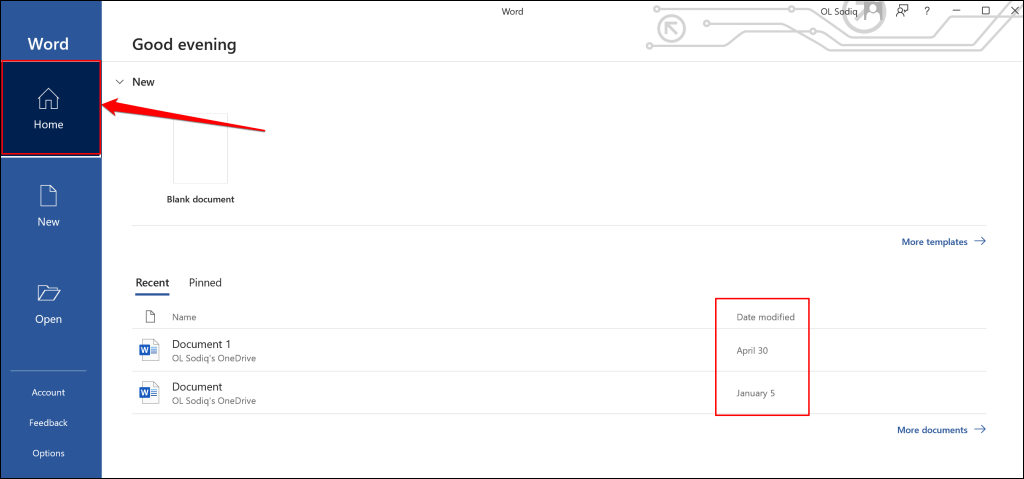
The Microsoft Word app homepage is another place to see the date Word documents were last modified. Open the Microsoft Word app on your computer and follow the steps below.
- Open the Home tab on the sidebar and check the Date modified column in the “Recent” section.
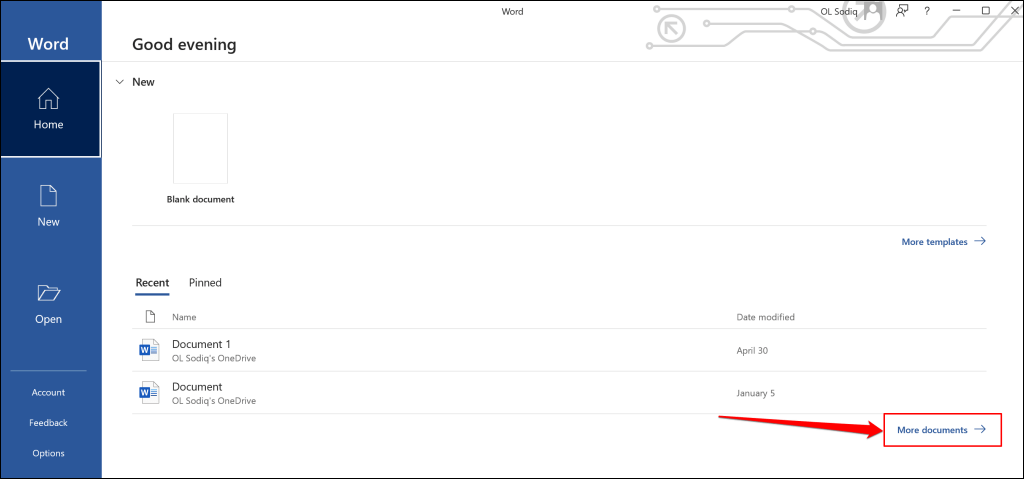
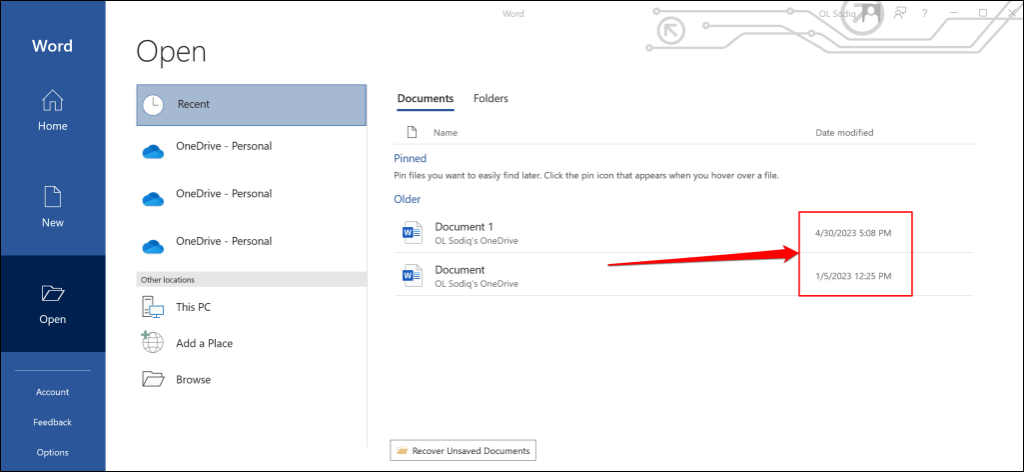
- Select More documents in the bottom-right corner to see the modification history of older documents.
- Check the Older section for the last modification date and time of your Word documents.
Insert Creation or Modification Date in Word Documents
Microsoft Word allows you to insert the date (and time) a document was created or edited as text.
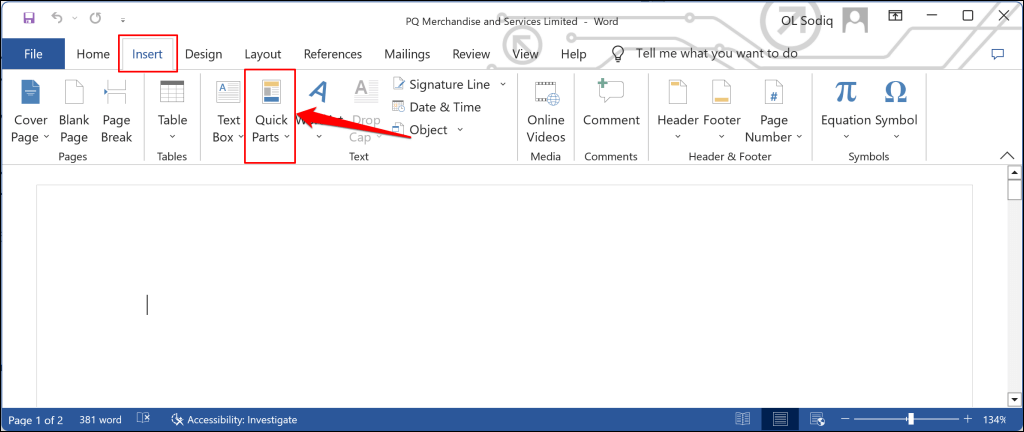
- Open the document in Microsoft Word and place your cursor where you want to insert the date(s).
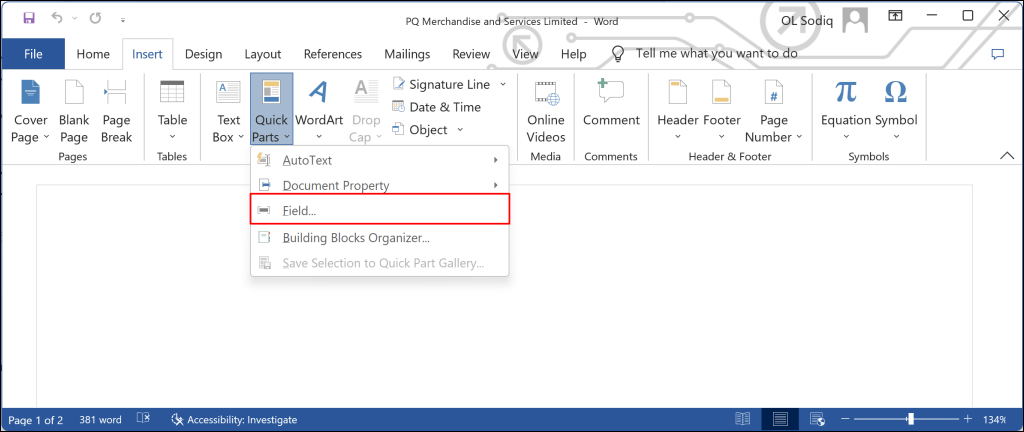
- Open the Insert tab and select Quick Parts in the “Text” section/group.
- Select Field in the drop-down list.
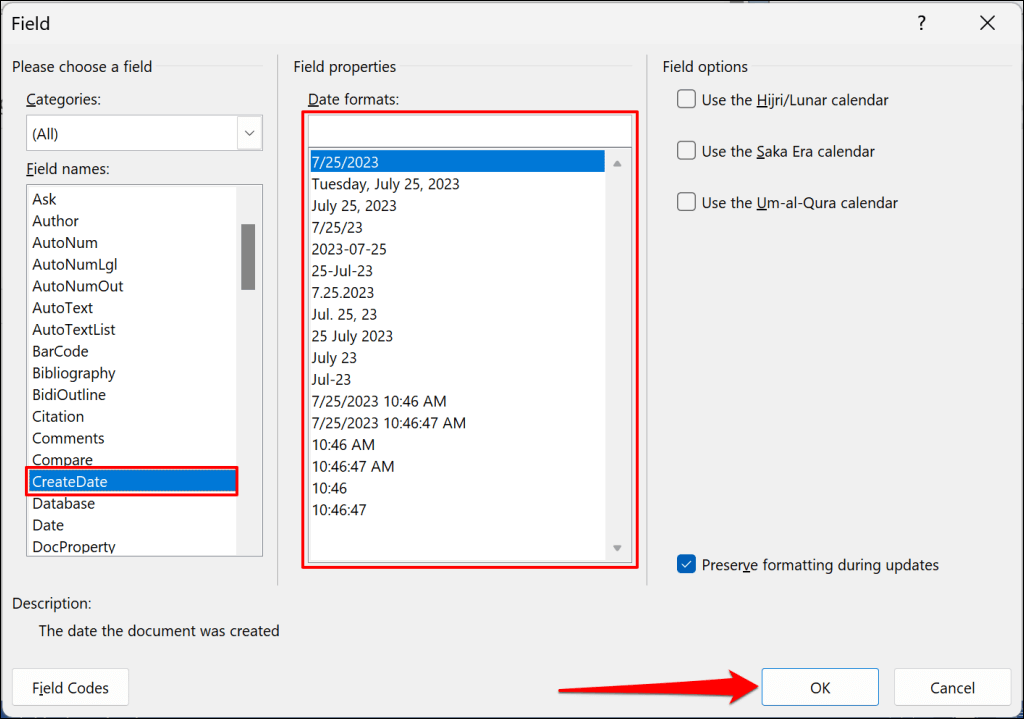
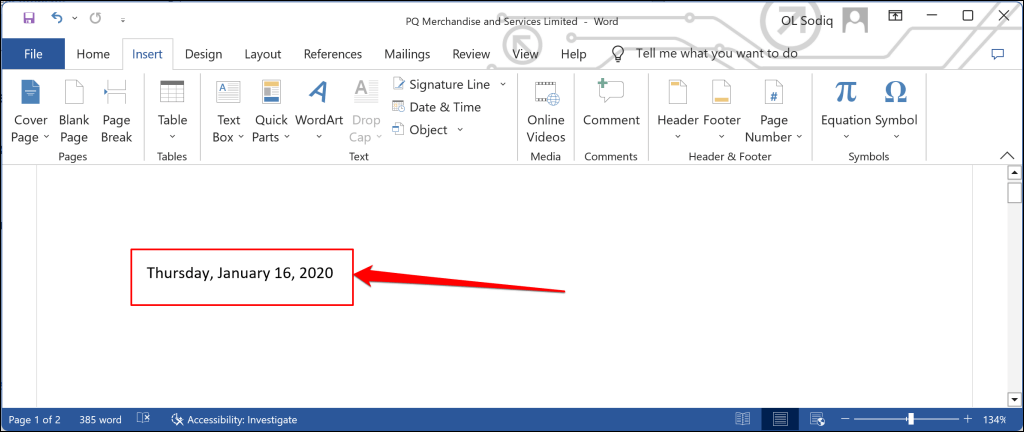
- Select CreateDate in the “Field names” field and choose a preferred format in the “Date formats” field. Select OK to insert the creation date in the document.
Although you’ll see the current date in the “Date formats” field, Word inserts the actual creation date in the document when you select OK.
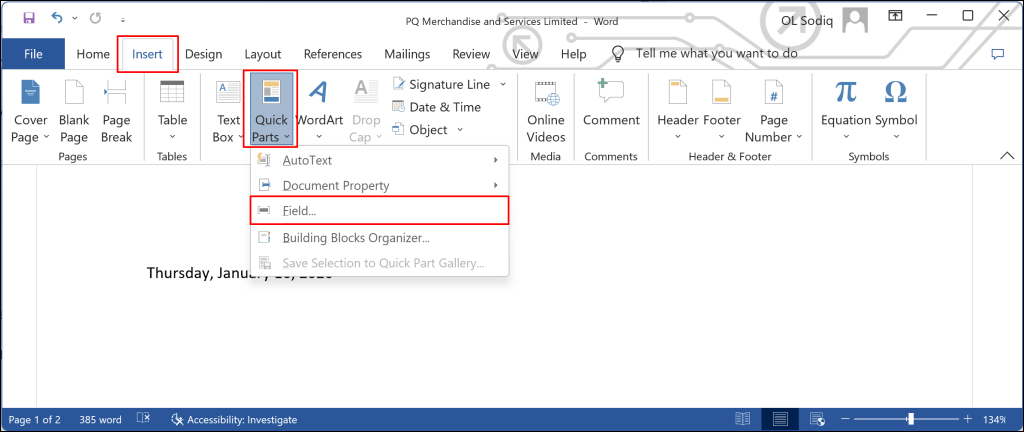
- To insert the date the document was last edited, go to Insert > Quick Parts and select Field.
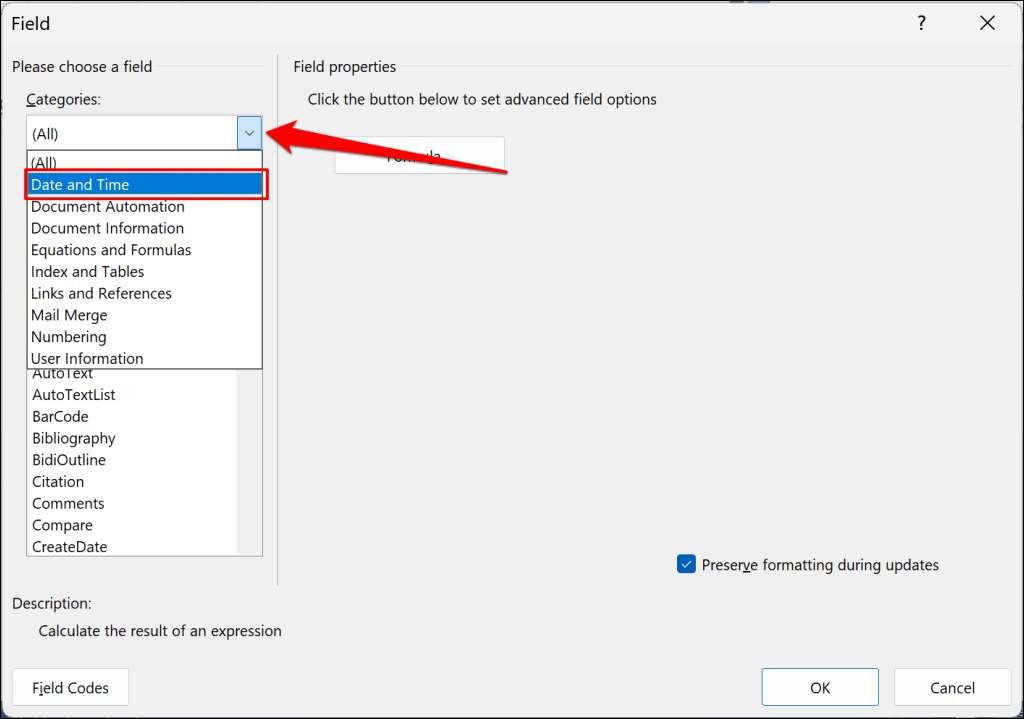
- Open the Categories drop-down menu and select Date and Time.
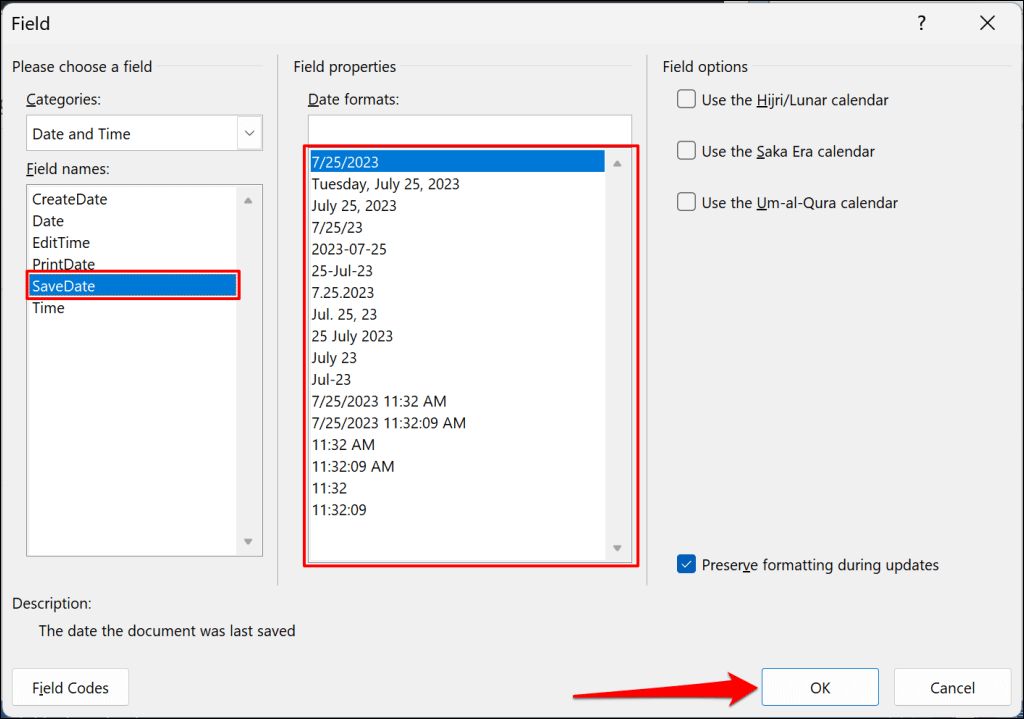
- Select SaveDate in the “Field names” field, choose a preferred date format, and select OK.
Word will insert a text field displaying the last time the document was saved or modified.
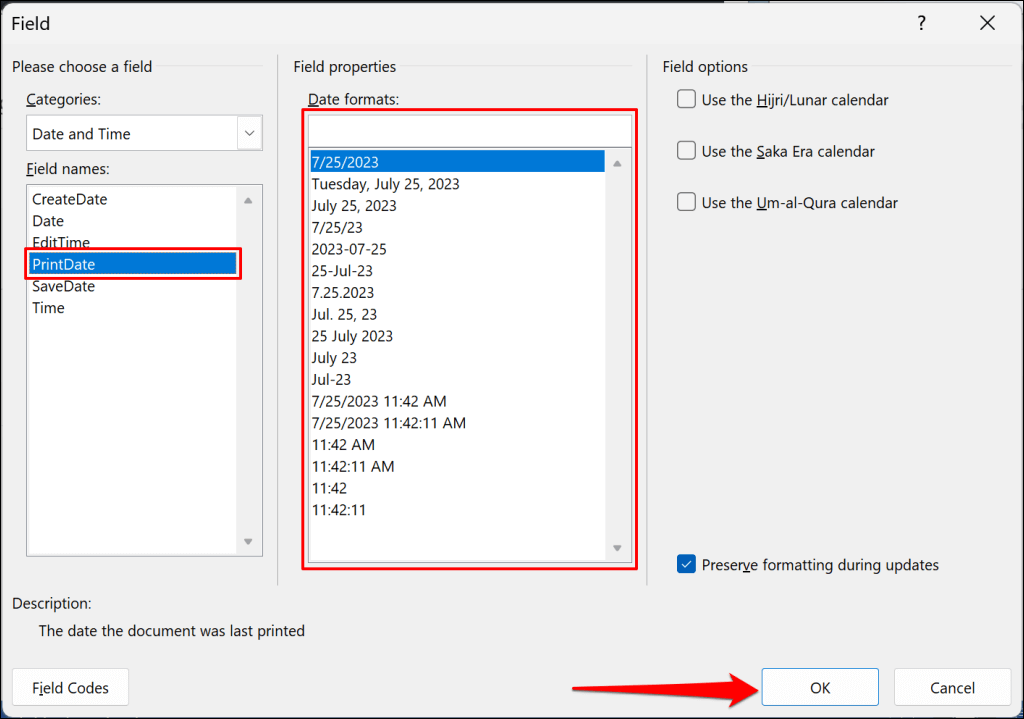
You can also insert the date the document was last printed—open the text field window and choose PrintDate. Choose a preferred date format and select OK to close the dialog box.
Note: Word automatically updates the print and modified date each time you edit or print the document.
Check Word Document Properties and History
Seeing when a Word document was created, modified, or printed can help you track changes made to the document. Update Microsoft Word on your computer if you have trouble viewing or inserting a document’s creation or modification date.
Source : https://ift.tt/hljaHyD
Comments
Post a Comment