How to Fix an Error 0x800f081f on Windows
Encountering a 0x800f081f error on a Windows 11 PC indicates one or more of your system updates failed to download or install. Many items can cause your updates not to download, with the Windows Update feature being critical. There are other reasons Windows doesn’t download your updates the right way. We’ll show you how to get around this error so you can update your PC without problems.
Some reasons you can’t update Windows and receive the above error are that you haven’t enabled a required option in Local Group Policy Editor, your PC’s .NET Framework isn’t working correctly, your Windows Update cache is faulty, your system files are broken, and more.
Use the Windows Update Troubleshooter
The Windows Update troubleshooter is one life-saving tool you can use whenever you face issues updating Windows. This tool identifies the update issues on your machine and helps you fix those items. This way, you can resume your update tasks.
This tool runs on its own for the most part; it only requires a little interaction from your end.
- Launch Settings on your PC by pressing Windows + I.
- Select System in the left sidebar.
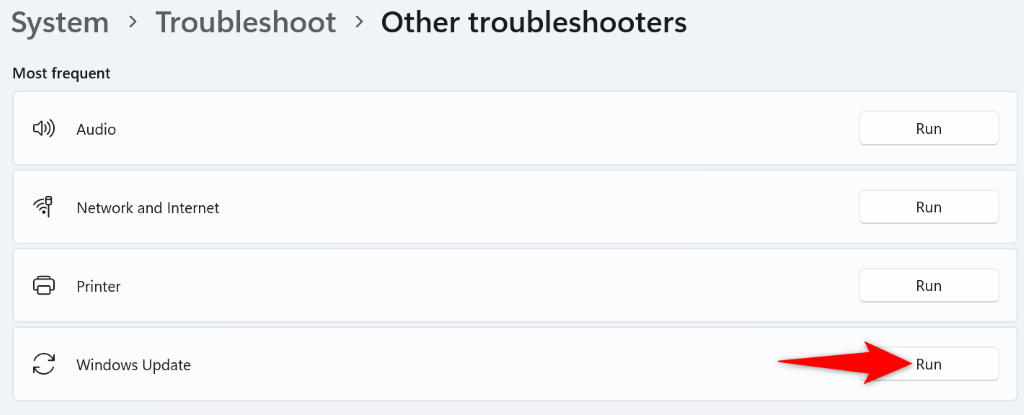
- Choose Troubleshoot on the right pane.
- Select Other troubleshooters.
- Choose Run next to Windows Update to launch the troubleshooter.
- Wait while the tool detects and fixes your update issues.
- When your update problems are resolved, head into Settings > Windows Update to update your system.
Turn On an Option in the Local Group Policy Editor
One way to resolve a Windows Update error 0x800f081f is by enabling an option in your Local Group Policy Editor. This option controls the optional component installation settings, and turning on the feature can resolve your update problem.
Note that you can’t use this method on Windows 11’s Home edition, as Local Group Policy Editor is only available in the Pro and other editions.
- Open the Run dialog box by pressing Windows + R.
- Type the following in the box and press Enter:
gpedit.msc - Head to the following path in the open tool:
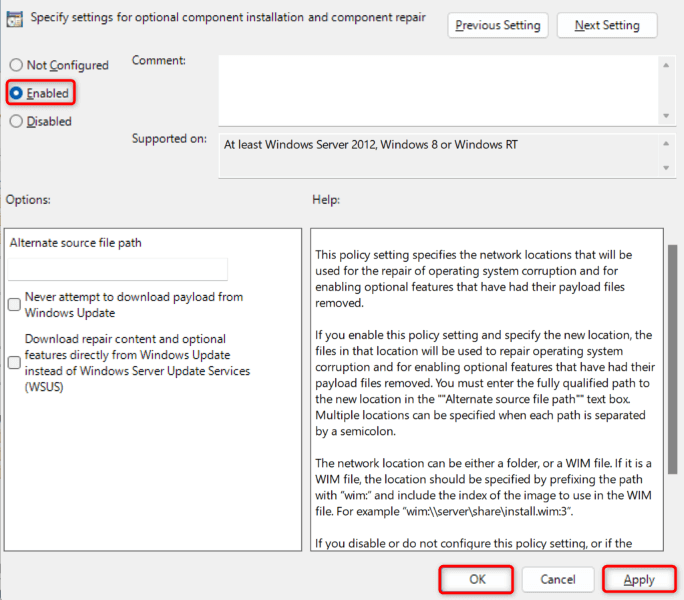
Computer Configuration > Administrative Templates > System - Find and double-click the entry saying Specify settings for optional component installation and component repair on the right pane.
- Choose Enabled on the window that opens.
- Select Apply followed by OK at the bottom.
- Close Local Group Policy Editor and try to download your Windows update.
Reinstall .NET Framework 3.5 on Your Windows 11 PC
If you still can’t update your PC as the error 0x800f081f keeps cropping up, your .NET Framework 3.5 installation might be faulty. Your PC uses this framework for various tasks, including running system features and installed apps.
In this case, you can remove and reinstall your .NET Framework version to fix your issue. You can do this using a built-in tool on your computer.
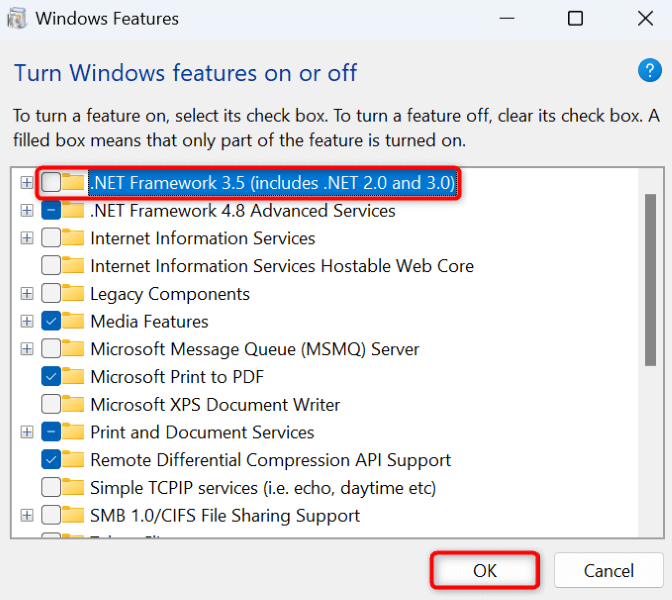
- Open your PC’s Start menu by pressing the Windows key, find Turn Windows features on or off, and select that item in the search results.
- Uncheck the .NET Framework 3.5 (includes .NET 2.0 and 3.0) option.
- Select OK at the bottom to remove the selected framework.
- When Windows has uninstalled the framework, access the same window, enable the option you disabled above, and choose OK. This reinstalls the .NET Framework on your PC.
Clear Your Windows Update Cache
Your Windows Update cache comprises the update files your PC has downloaded. These downloaded files may be corrupt, causing your PC not to download or install newer updates. A bad update cache often causes various issues.
One way to get around that is to delete your current update cache and let Windows rebuild the cache. You don’t lose your personal files when you do this, and Windows will re-download the required update files.
- Launch Run by pressing Windows + R, type the following in the box, and press Enter:
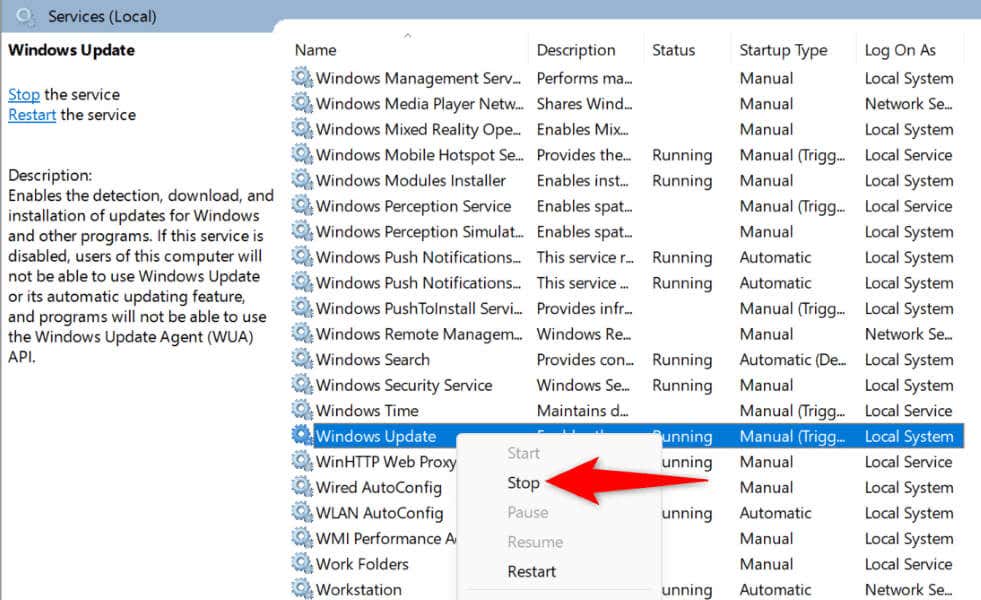
services.msc - Right-click the service named Windows Update on the list and choose Stop. You’re stopping this service before deleting the update cache. You’ll return to this window shortly, so keep the window open.
- Open Run again, enter the following path in the box, and press Enter:
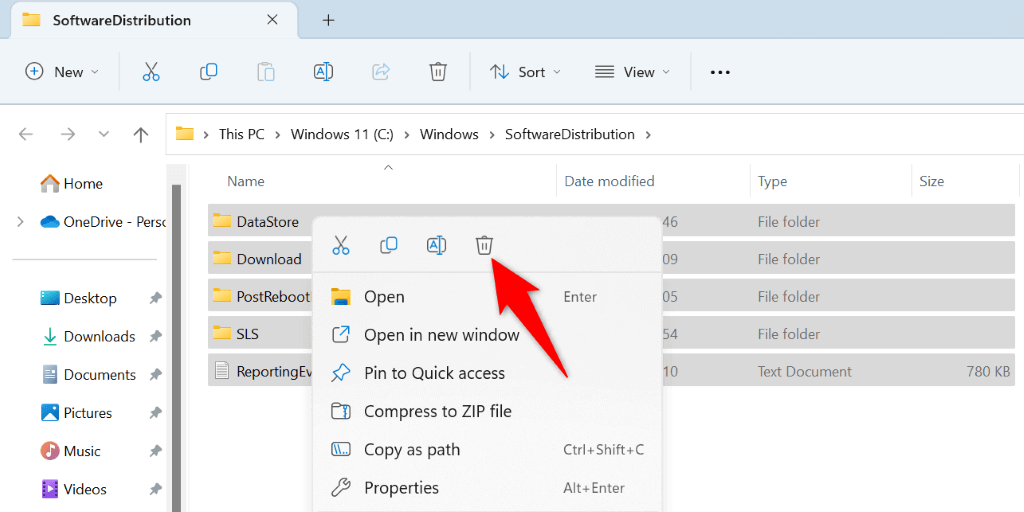
C:\Windows\SoftwareDistribution - Highlight all files in the folder by pressing Ctrl + A.
- Delete all highlighted files by right-clicking a selected file and choosing Delete (a trash can icon).
- Close the File Explorer window, return to the Services window, right-click Windows Update, and choose Start.
- Download and install your system updates in Settings > Windows Update.
Fix Windows’ Corrupted Core Files
Windows’ corrupted core files can cause many issues on your computer, including causing Windows Update not to function as expected. Your update error 0x800f081f may be the result of broken system files.
In this case, use your PC’s built-in System File Checker (SFC) tool to find and fix all the faulty files. This tool runs a scan, finds all the corrupted files, and replaces those files with working ones.
- Open an elevated Command Prompt window. Do this by accessing the Start menu, finding Command Prompt, and selecting Run as administrator.
- Choose Yes in the User Account Control prompt.
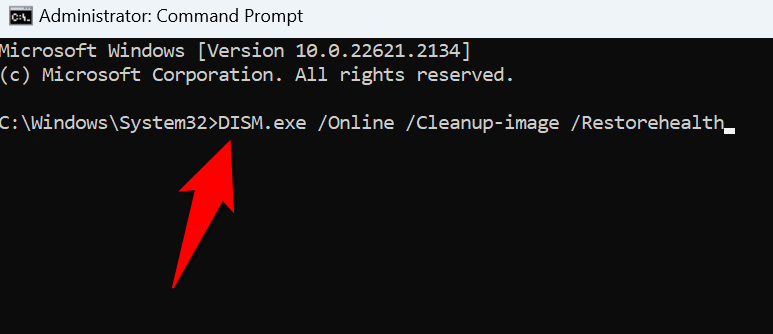
- Type the following command at the CMD prompt and press Enter. This command obtains the files your PC needs to fix the corrupted files.
DISM.exe /Online /Cleanup-image /Restorehealth
- Next up, run the following command to begin finding and fixing your system’s bad files:
sfc /scannow - Restart your PC when your corrupted files are fixed.
- Update your Windows system.
Manually Download and Install Your Windows 11 Update
If your update doesn’t download and you keep getting an error 0x800f081f, you can manually download and install that particular update on your PC. This process doesn’t use the broken Windows Update feature and lets you update your system when no other methods work.
Ensure you’ve noted your update name, as you’ll use this name to download the update file. You can find the name on the Windows Update screen.
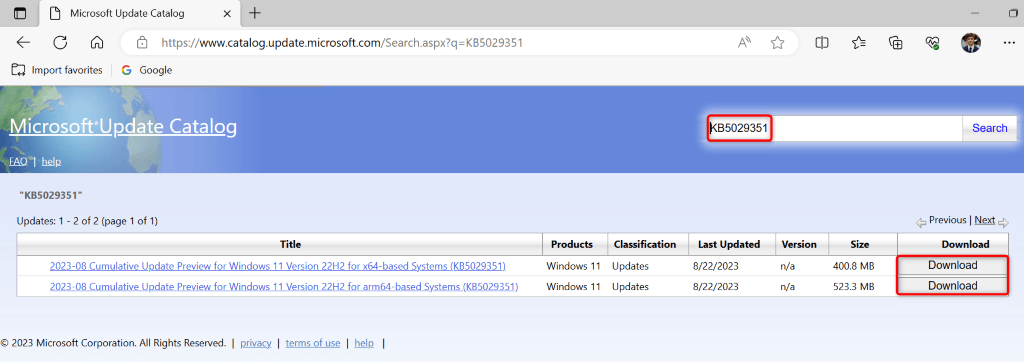
- Open a web browser on your PC and launch the Microsoft Update Catalog site.
- Enter your update’s name in the search box on the site and press Enter.
- Select Download next to your update to save the update file to your PC.
- Run the downloaded file to install the update manually.
- Reboot your PC when you’ve installed the update.
Reset Your Windows 11 PC
If you get a 0x800f081f error even after manually installing the update, your system settings might be faulty. Windows lets you customize nearly all the aspects of your PC, and you or someone else may have modified specific settings incorrectly, causing your issue.
In this case, bring all your Windows 11 settings to the defaults to fix your issue. You lose your custom settings and installed apps when you do this. Your files are retained, though.
- Open Settings by pressing Windows + I.
- Select System in the left sidebar.
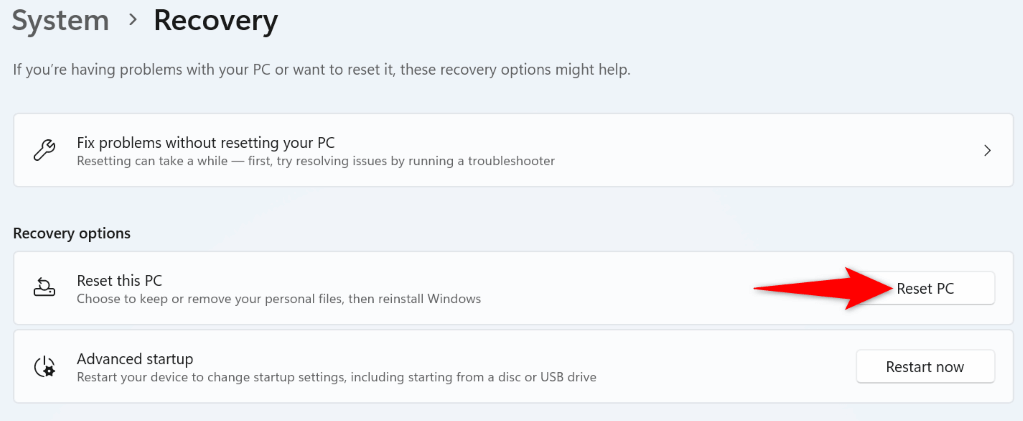
- Choose Recovery on the right pane.
- Select Reset PC next to Reset this PC.
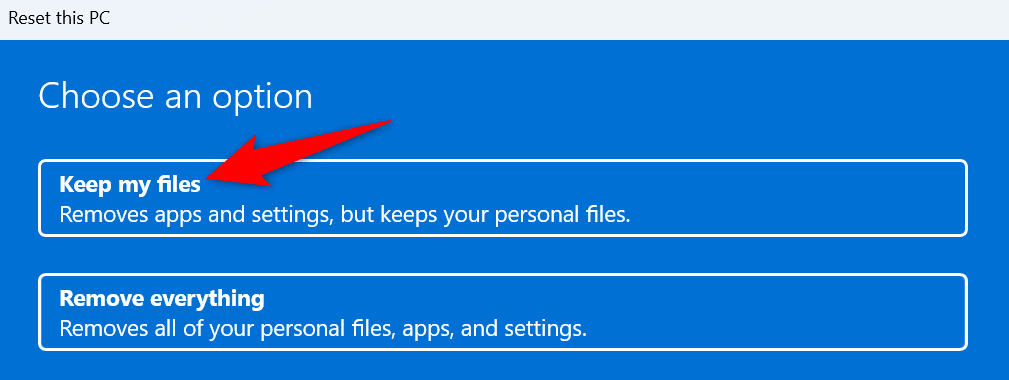
- Choose Keep my files so Windows doesn’t delete your files.
- Select Local reinstall and choose Next to begin resetting your PC.
- Update your system when the reset process is finished.
Get Rid of the Error Code 0x800f081f From Your Windows 11 PC
Your Windows 11 PC displays the above update error for various reasons. If your updates don’t install normally and you continue to run into that error, use the methods described above to resolve the issue.
You can then update your system using the latest updates available in Windows Update.
Source : How to Fix an Error 0x800f081f on Windows
Comments
Post a Comment