How to Curve Texts in Microsoft PowerPoint
Too much text in your PowerPoint presentation can make for a dull experience for your audience. You’ll need to make important pieces of text stand out, but how?
Depending on your audience, you could use the built-in text effect tools to curve text in PowerPoint. This will add some flair to your presentation, emphasizing important phrases or topic titles, but be warned—too many special effects like this one can ruin your presentation.
If you’re thinking about how to curve text in Microsoft PowerPoint, follow the steps below.
Should You Use Curved Text in PowerPoint?
Using curved text in PowerPoint can have advantages and disadvantages, depending on your presentation’s purpose and target audience.
As a positive, curved text will grab your audience’s attention by making the text stand out against anything else on your slides. Curved text can also help you emphasize your main points and keywords against the background while matching the theme or mood of your presentation in the process.
However, there’s an obvious problem with curved text in PowerPoint—how it looks.
For instance, WordArt is one of two methods you can use for curving text in PowerPoint, and it has a reputation for looking somewhat childish. If professionalism is the aim, WordArt (and curved text effects generally) is best avoided, especially as there are other PowerPoint special effects that you can use instead.
Curved text can also be difficult to edit and position in your presentation, forcing you to rearrange other items to make it fit.
How to Curve Text in PowerPoint Using WordArt
If you’ve decided to use curved text effects in PowerPoint, one of two methods you can use to do it is to use WordArt. WordArt is a feature that allows you to insert decorative and stylized text into your slides. WordArt has many preset styles and effects that you can apply to your text, including curving options.
To curve text in PowerPoint using WordArt, follow these steps.
- Open your PowerPoint presentation and select the slide you want to insert your WordArt effect into.
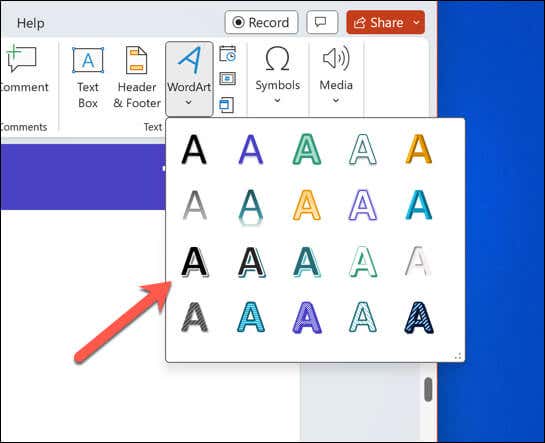
- From the ribbon bar, select Insert > WordArt.
- Select a preset WordArt style you’d like to use—this will allow you to enter your text into a curved shape.
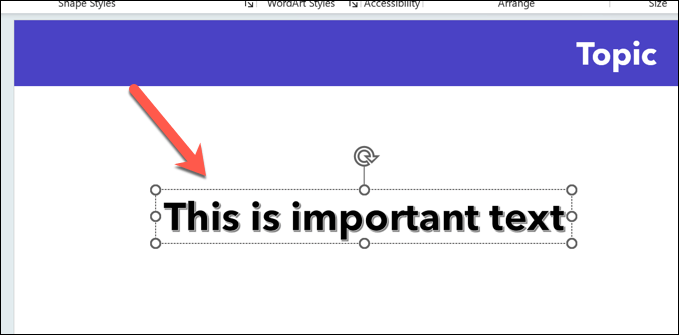
- On the slide, move your inserted WordArt box into position and replace the placeholder text with the text you want to use.
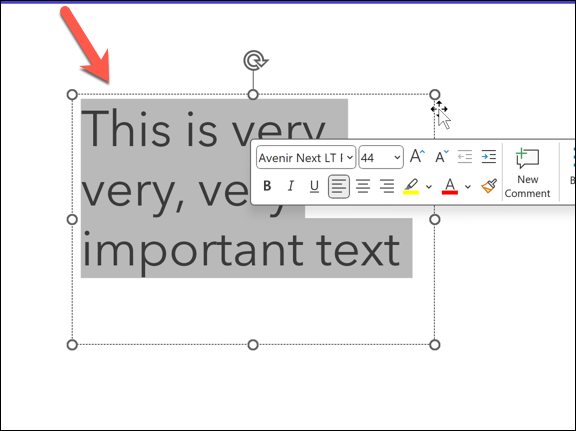
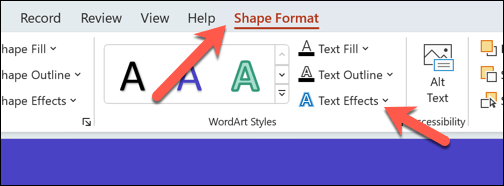
- Once the text is inserted, select the text and press the Shape Format tab on the ribbon bar. On older versions of PowerPoint, this might be listed as Drawing Tools Format instead.
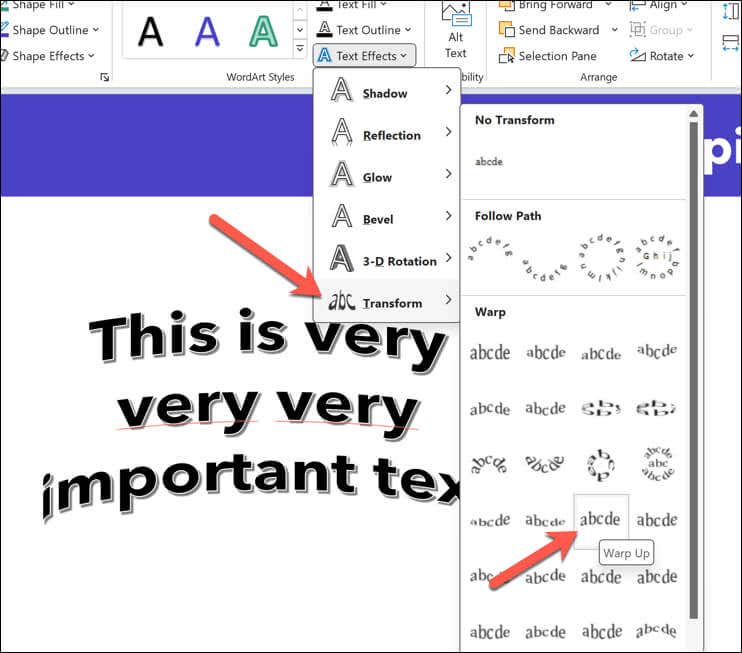
- Select the Text Effects button in the WordArt Styles section.
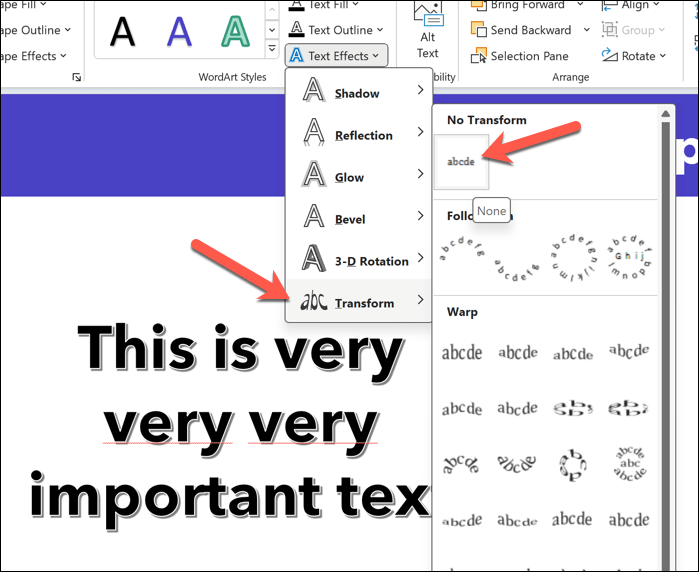
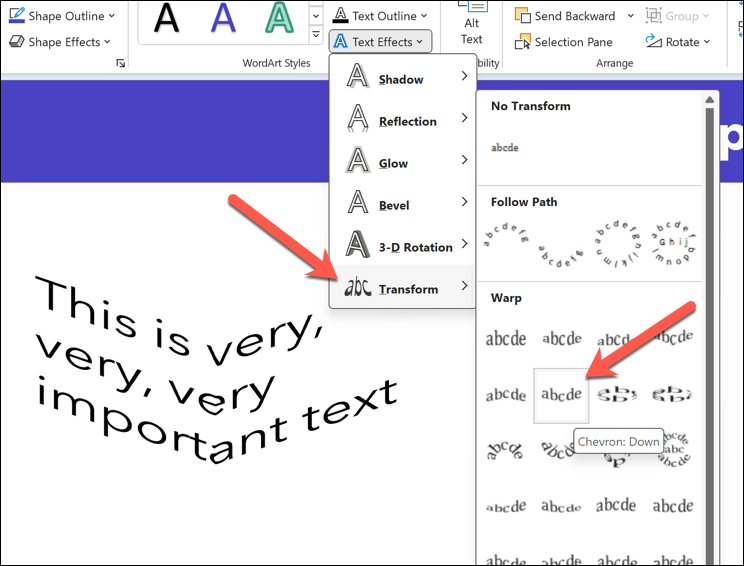
- From the drop-down menu, select Transform, then hover over any of the curved text effect options from the drop-down menu—your text will briefly update to show the new effect.
- Select any of the options listed to apply it to your text. You can also repeat these steps to choose a new text effect at any point.
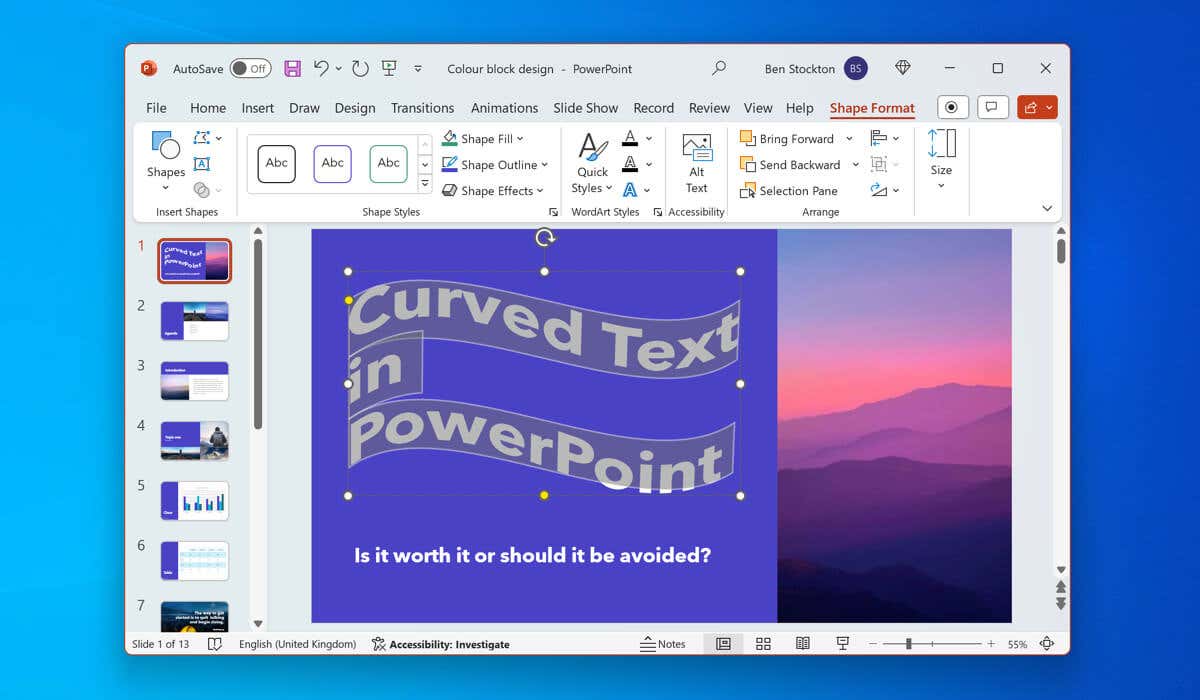
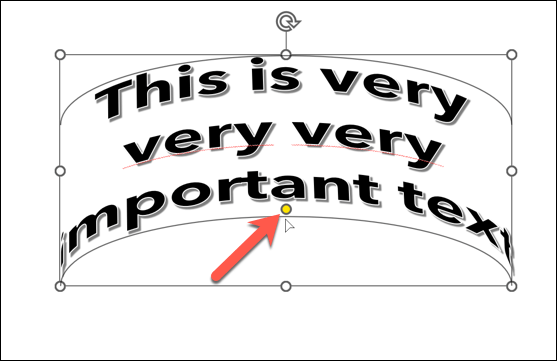
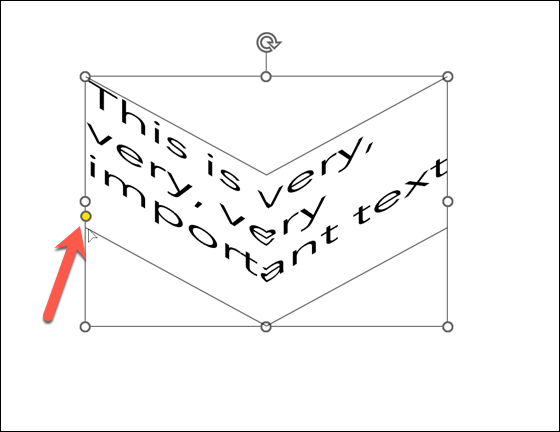
- To change the curvature of the text, make sure the WordArt object (but not the text itself) is selected, then drag the orange handle icon around to change the curvature.
- To remove the effect at any point, press Text Effects > Transform > No transform.
How to Curve Standard Text in PowerPoint
If you’d prefer to avoid WordArt, you can use similar steps to curve standard text in PowerPoint. You can do this by inserting a text box and applying a text effect to the text you’ve inserted.
To curve standard text in PowerPoint, follow these steps.
- Open PowerPoint and select a slide to insert the text into.
- From the ribbon bar, select Insert > Text Box.
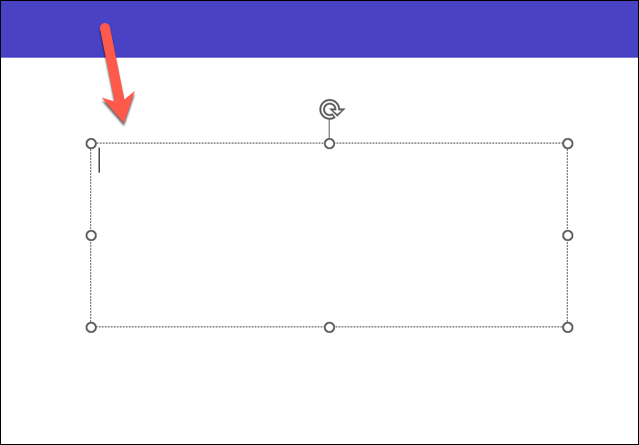
- On the slide, use your mouse to place your new text box, then type your text into the box.
- Once you’ve inserted your text, select it in the text box.
- Next, press the Shape Format tab on the ribbon bar, then press the Text Effects button in the WordArt Styles section.
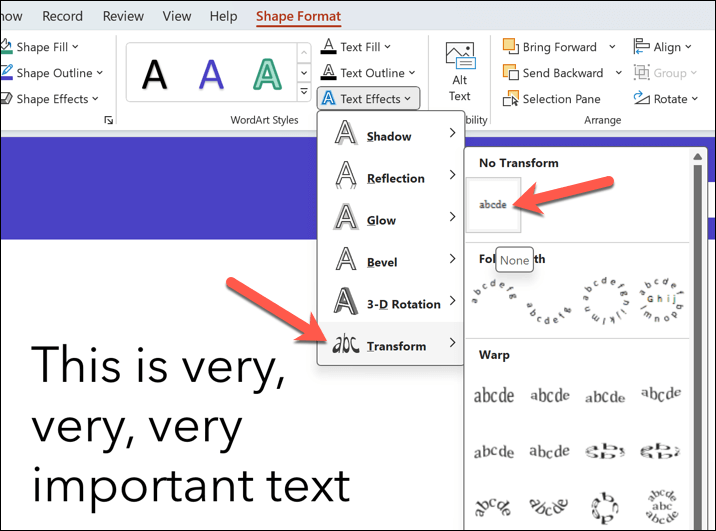
- Hover over the Transform menu in the drop-down menu, then hover over any curved text effect options. The text effect will be briefly applied to allow you to see how it will look.
- Click on any of the effects to apply it to your text permanently.
- To change the curvature of the text, make sure the text box object (but not the text within the box) is selected with the text effect applied, then move the orange handle icon around using your move to change the curvature.
- To remove the text effect at any point from your text box, press Text Effects > Transform > No transform.
Creating Impressive PowerPoint Presentations
It might seem simple, but curving text in PowerPoint is a simple and quick way to enhance parts of your slide text—if you use it sparingly. If you’re looking for other PowerPoint tips, however, you may want to consider how you’re using PowerPoint to present to your audience.
For instance, you could draw on your PowerPoint slides in a live presentation to highlight specific points mid-flow. You can also use PowerPoint’s autoplay feature to get PowerPoint to loop through your slides automatically.
Source : How to Curve Texts in Microsoft PowerPoint



Comments
Post a Comment