How to Fix a “Download error – 0x8024a206” on Windows 11
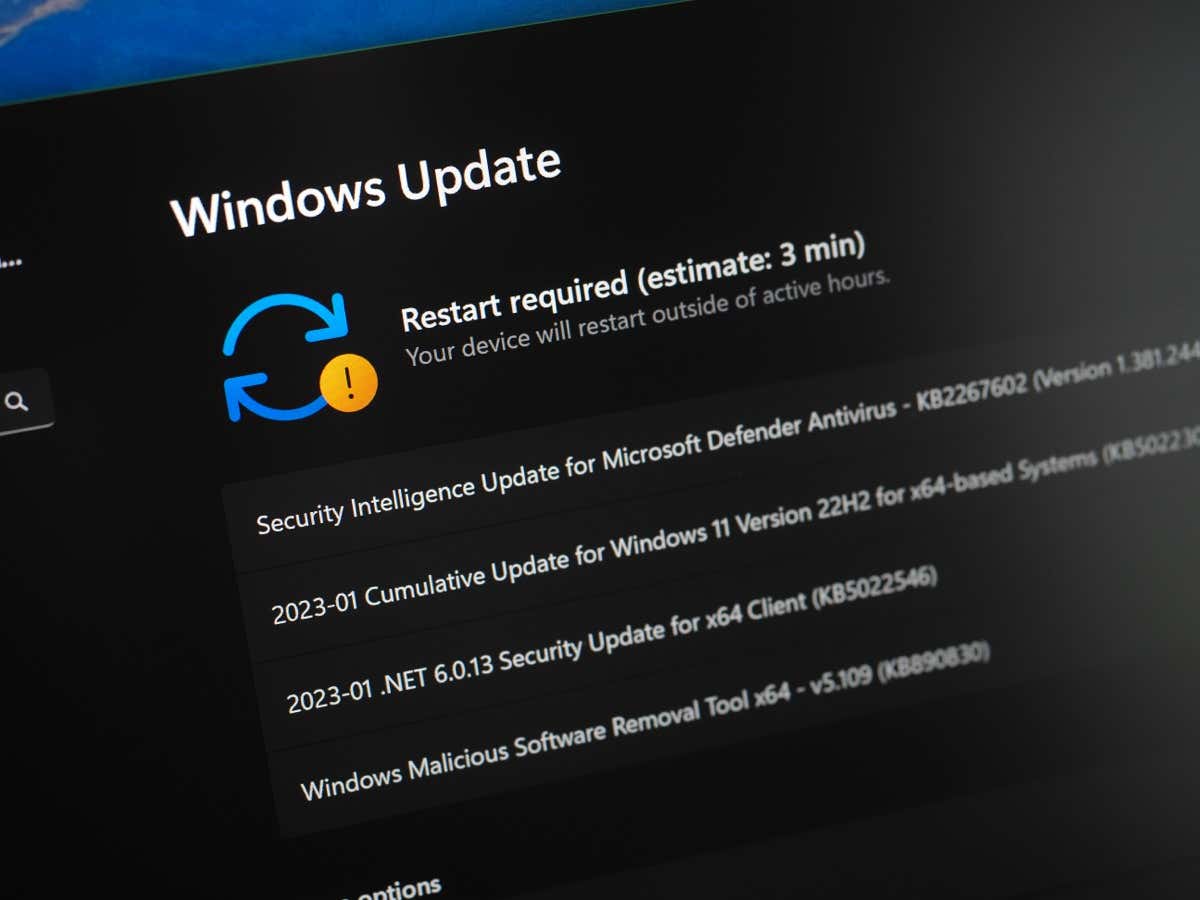
Are you running into a “Download error – 0x8024a206” error while trying to update a Windows 11 PC? Chances are your Windows Update feature is broken, causing your updates not to download. There are other reasons, like your update cache being corrupt, leading to the above error. You can apply a few tweaks to your PC to possibly resolve your issue and download your update. We’ll show you what those tweaks are.
Since an update error occurs for various reasons, you’ll likely have to follow multiple methods before your issue is resolved. Some possible reasons your update fails to download are that your third-party antivirus is interfering with the download, you don’t have enough disk space, your system files are corrupted, and more.
Try Downloading Windows 11 Update Again
When your update fails to download in the first attempt, try to download the update again. It’s possible a minor glitch caused your update not to download in the first attempt, which you can possibly fix by retrying the update download.
You can select the Retry option on the Windows Update screen to force your PC to download that particular update. If your update downloads successfully, install the update and reboot your PC.
Turn Off Third-Party Antivirus Programs
If you’ve installed a third-party antivirus program (one that isn’t Microsoft Defender Antivirus), your program may be blocking your Windows update download. Your program may have detected your update as a potential threat, causing the update not to download. This usually happens when your antivirus produces a false positive.
In this case, temporarily disable your program’s antivirus protection and see if that lets you download your update. If this solution fixes your issue, you may want to reach out to your antivirus maker to report your issue, or else your program will continue blocking future Windows updates on your PC.
Run Windows Update Troubleshooter
Windows 11 includes a Windows Update troubleshooting tool that you can use to fight against any update problems. This tool automatically finds the issues with your updates and allows you to fix those issues.
The tool is easy to use and requires very little interaction from your end.
- Launch your PC’s Settings app by pressing Windows + I.
- Select System in the left sidebar.
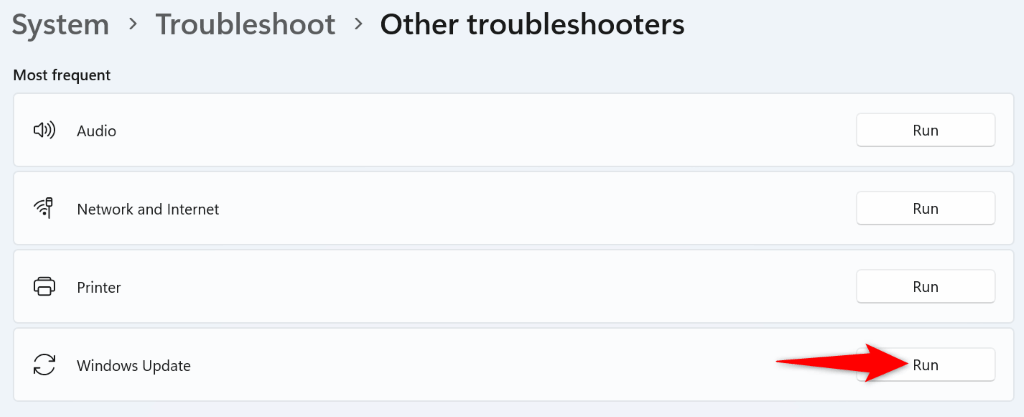
- Choose Troubleshoot > Other troubleshooters on the right pane.
- Select Run next to Windows Update to launch the troubleshooter.
- Follow the on-screen instructions in the open tool to find and fix your update issues.
Clear Your Update Cache on Windows 11
Windows 11 stores all your downloaded update files in a specific folder. It’s possible this update cache has become corrupted, causing issues with your updates. This can lead to a “Download error – 0x8024a206” on your PC.
In this case, you can resolve the issue by clearing your update cache files. Doing so deletes all the faulty cache files and forces Windows to re-download working new files. Note that you don’t lose any personal files when you do this.
- Launch the Run dialog box by pressing Windows + R.
- Enter the following in the box and press Enter:
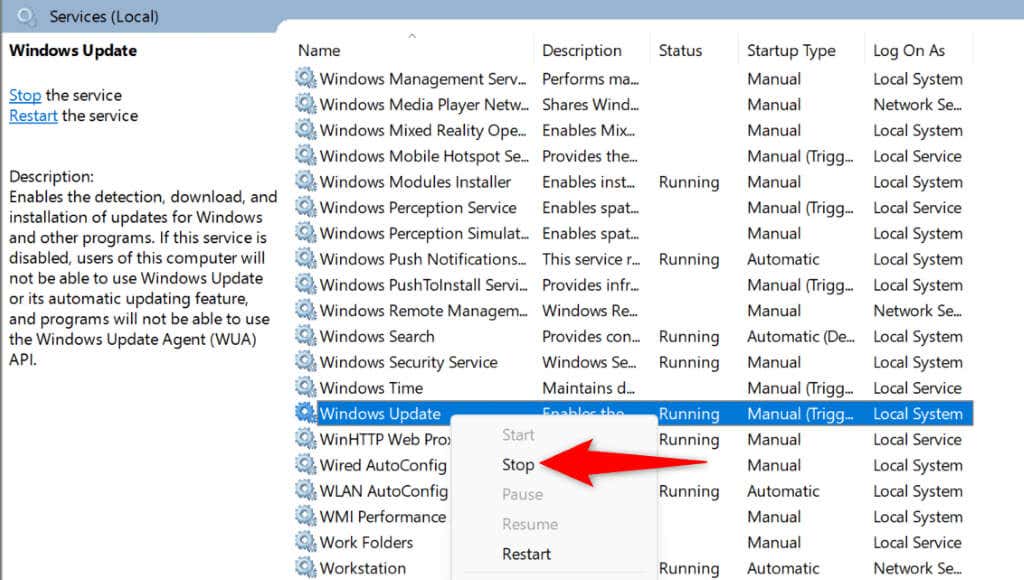
services.msc - Select the Windows Update service on the list and choose Stop. Keep this window open, as you’ll return here after clearing your update cache.
- Open the Run box again, enter the following path in the box, and press Enter:
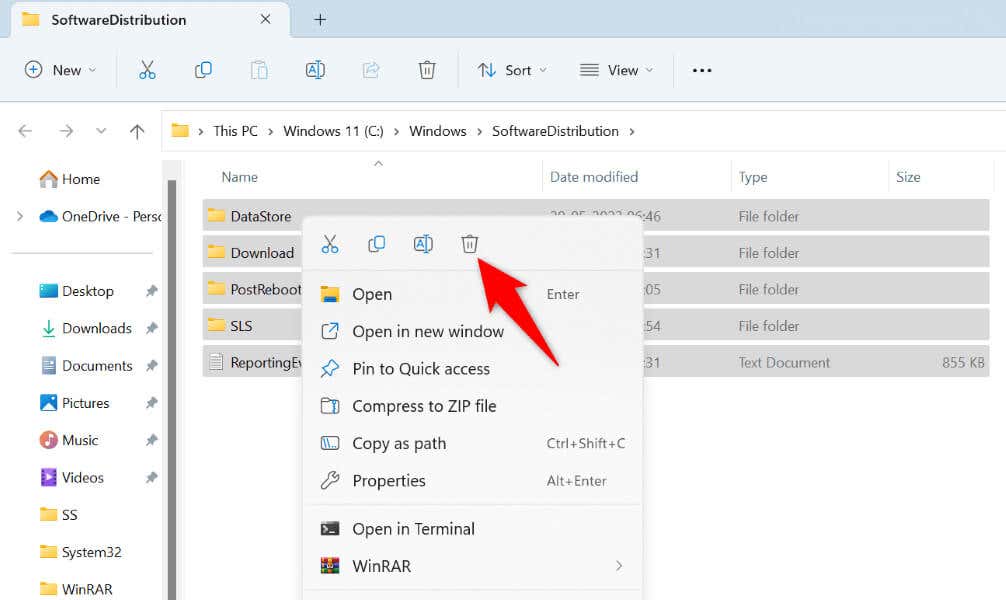
C:\Windows\SoftwareDistribution - Select all files in the folder by pressing Ctrl + A.
- Delete all files by right-clicking a selected file and choosing Delete (a trash can icon).
- Get back to the Services window, right-click Windows Update, and choose Start.
- Close the Services window, head into Settings > Windows Update, and download your updates.
Free Up Disk Space to Resolve Your Windows Update Error
One reason your Windows 11 update fails to download is that your PC doesn’t have enough free storage space to accommodate the update files. You may have used up all your PC’s available storage space, leaving no room for system updates.
In this case, free up your PC’s storage space by deleting large files, removing unwanted photos and videos, uninstalling unwanted apps, and clearing duplicate files.
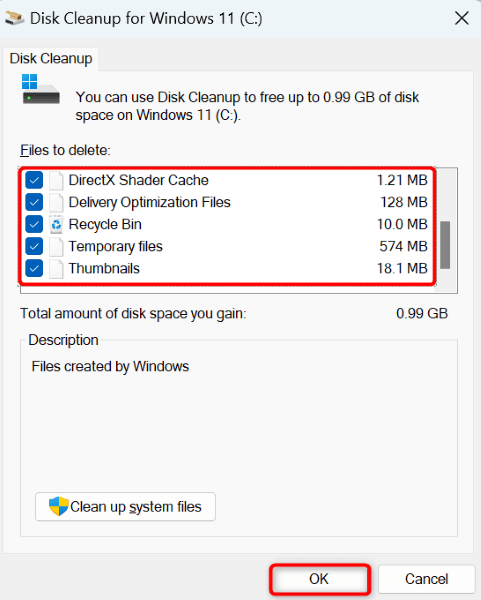
You can use the Disk Cleanup utility to find and remove many unnecessary files from your PC.
- Open the Start menu, find Disk Cleanup, and launch the utility.
- Select your Windows 11 installation drive in the drop-down menu and choose OK.
- Select the files you’re okay to remove in the Files to delete section.
- Choose OK at the bottom.
- Select Delete Files in the prompt to remove the selected files.
Check Your Disk for File System Errors
If your PC doesn’t download updates even after making room for those updates, your Windows installation disk may have a file system error. Such an error prevents you from adding new files to your disk.
In this case, use your PC’s built-in disk error checker to find and resolve your disk’s file system problems.
- Launch a File Explorer window by pressing Windows + E.
- Right-click your Windows installation drive and choose Properties.
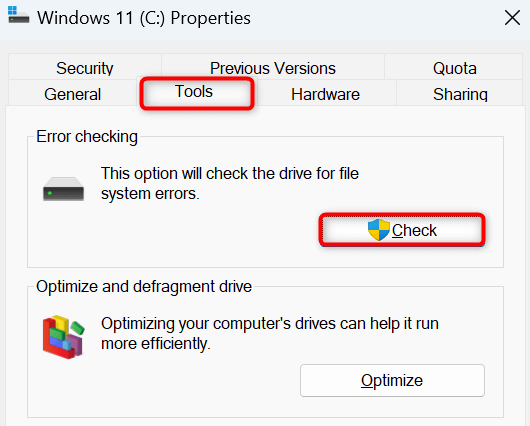
- Select the Tools tab and choose Check in the Error checking section.
- Select Scan drive to find and fix your disk’s file system errors.
Fix Windows 11’s Corrupted System Files
If your update continues to fail to download, it’s possible your system’s core files are corrupted. This breaks the built-in Windows Update feature, leading to a “Download error – 0x8024a206” error.
Luckily, you can use a built-in tool on your PC to find and fix all your corrupted system files. You can run this tool from a Command Prompt window, locate all the broken core files, and replace those files with working ones.
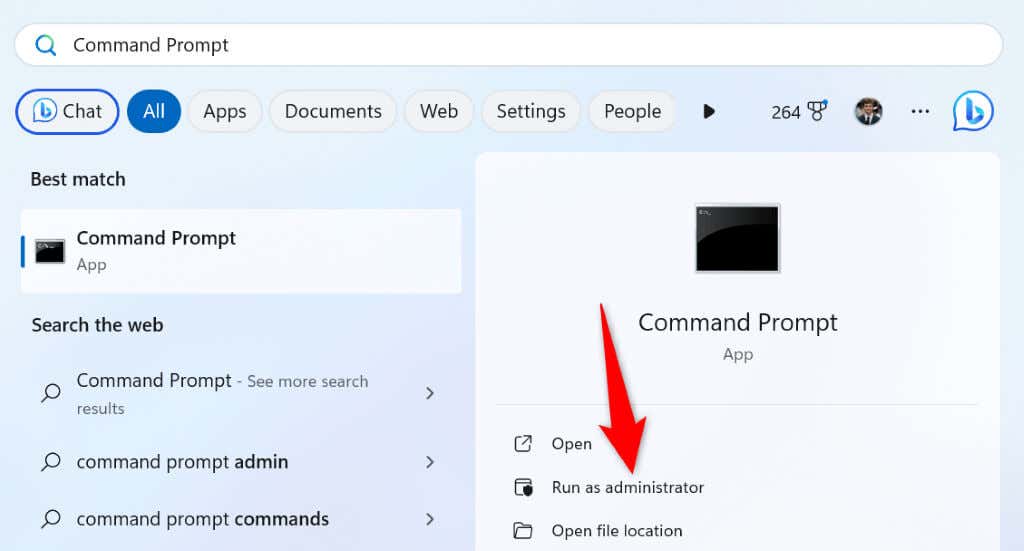
- Open an elevated Command Prompt window on your PC. You can do this by opening the Start menu, finding Command Prompt, and selecting Run as administrator.
- Select Yes in the User Account Control prompt.
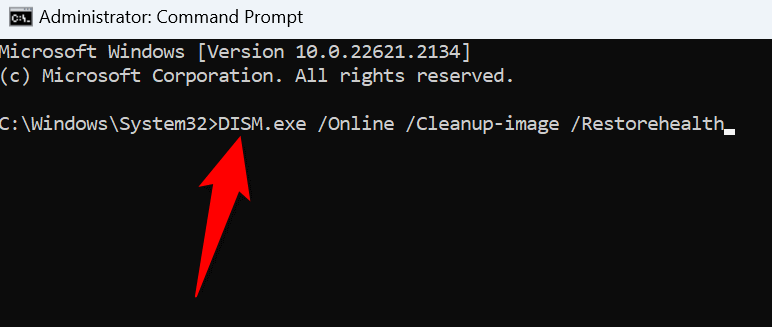
- Type the following on the open CMD window and press Enter. This command downloads the files required to repair your system.
DISM.exe /Online /Cleanup-image /Restorehealth
- Run the following command to find and fix your PC’s corrupted files: sfc /scannow
- Restart your PC and update Windows from Settings > Windows Update.
Manually Download and Install Your Windows 11 Update
If all methods fail to resolve your “Download error – 0x8024a206” issue, your last option is to manually download and install your specific update on your PC. You can get the update from an official Microsoft website and run the update file to update your system. This bypasses your PC’s Windows Update feature, letting you update your computer even when that feature is broken.
Note that you’ll need your update’s name to download the update from the Microsoft site. You’ll find the update’s name (usually starting with KB) on your Windows Update screen.
- Open your preferred web browser on your PC and access the Microsoft Update Catalog site.
- Enter your update’s name in the search box on the site and press Enter.
- Find your update on the list, select Download next to the update, and save the update to your computer.
- Run the downloaded update file to install the update.
- Restart your PC when you’ve installed the update.
Get Around a Download Error Code 0x8024a206 on Your Windows 11 PC
If your Windows 11 system continues to fail to download an update, use the methods outlined above to resolve your problem. This is because your update feature may be broken, or your PC may have another issue. The methods above fix all the items that can possibly cause your update not to download, resolving your issue. Good luck!
Source : How to Fix a “Download error – 0x8024a206” on Windows 11

Comments
Post a Comment