How to View Excel Files Version History (And Restore Previous Versions)
Did you know that you can view and restore previous versions of workbooks using the version history in Excel? From changes made by collaborators to those you make mistakenly, you can rescue that spreadsheet easily.
In Microsoft Excel on Windows, Mac, and the web along with OneDrive and SharePoint, you have a variety of ways to see the version history of your workbook. You can see the change, find the mistake, or restore the entire file in just minutes.
About Microsoft Excel Version History
Seeing the version history for a Microsoft Excel workbook has many benefits and can be especially useful when collaborating with others. You may want to see who changed what, when the last edit took place, or even restore a previous version.
In order to use the version history in Excel, keep the following in mind:
- You must store the file in OneDrive or SharePoint if you’re using Microsoft 365 (Office 365).
- You can retrieve 25 previous versions of your file with a personal Microsoft account.
- You can retrieve the number of previous versions according to your library configuration with a Microsoft work or school account.
- You must have version history turned on in SharePoint to retrieve previous versions using that platform.
Tip: If you’re in the habit of saving your Excel files locally by default, consider switching to the AutoSave feature using OneDrive to safely store the workbook.
Version History in Excel on Windows
You can easily view the version history, see the edits, and restore a previous version of an Excel file on Windows.
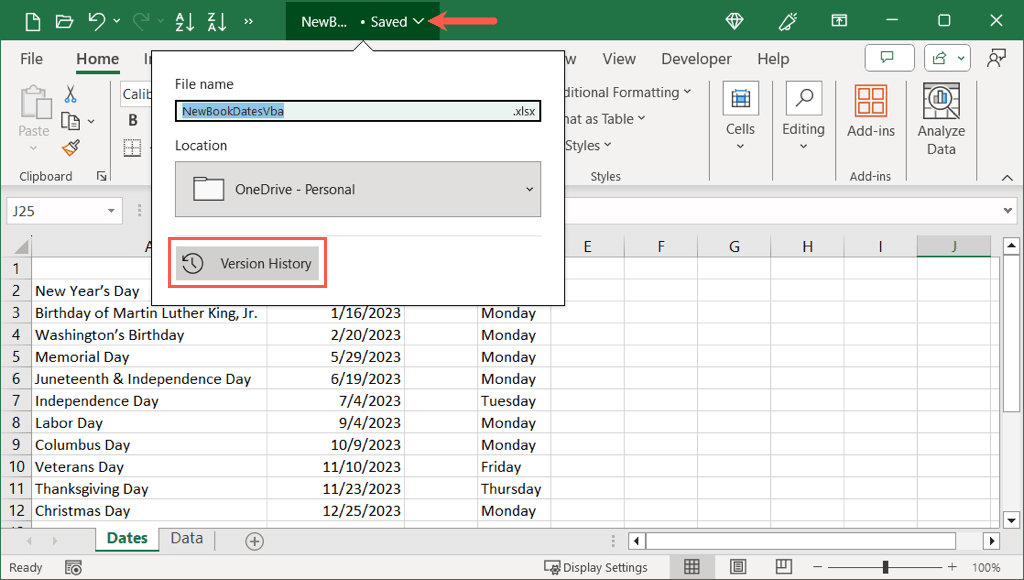
- With your workbook open, select the down arrow to the right of the file name at the top of the window and choose Version History.
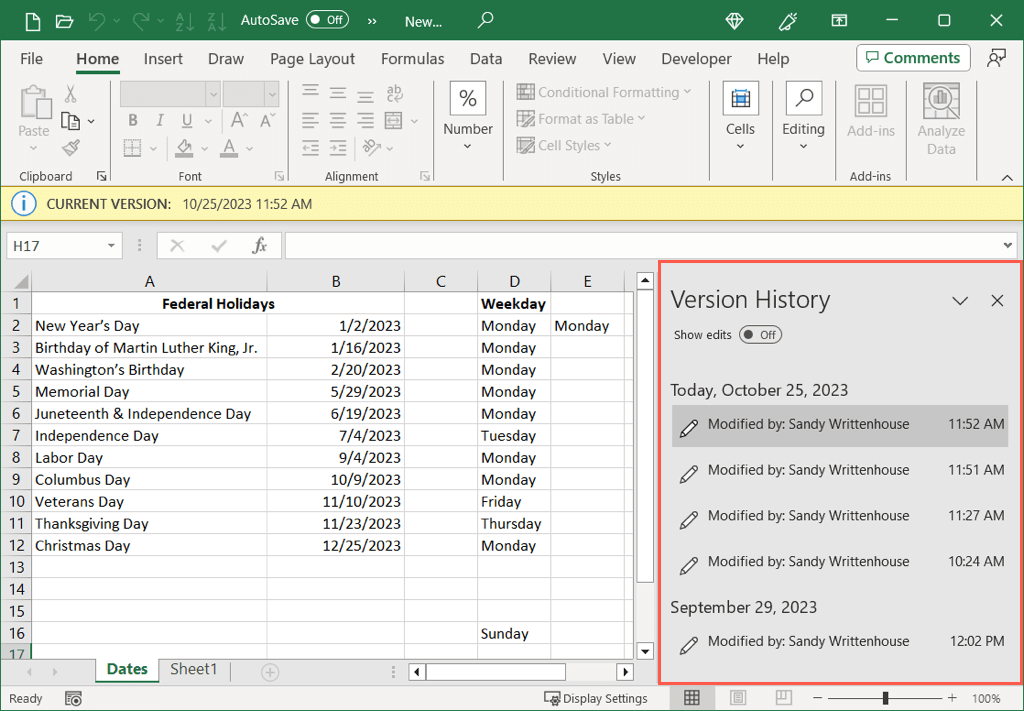
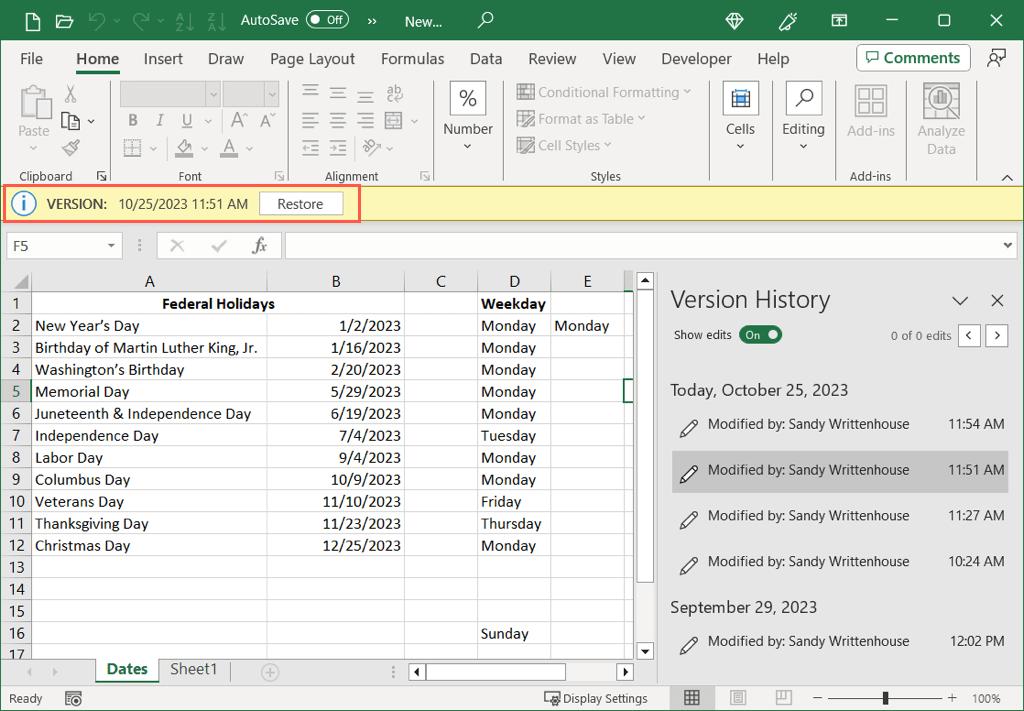
- You’ll see a new workbook open with the version history in a sidebar on the right. You can see all versions of the workbook with the date, time, and user’s name.
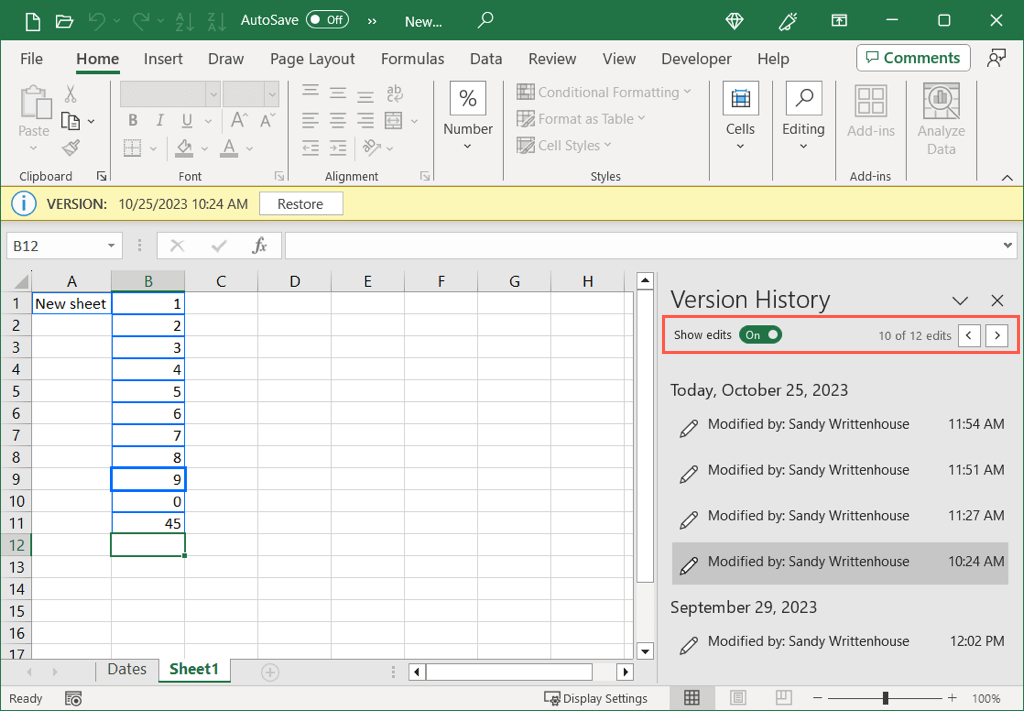
- At the top of the sidebar, turn on the toggle for Show edits to see all changes made. You can then use the arrow buttons that appear to move from one edit to the next. These edits display highlighted directly on the worksheets.
- To restore a previous version, select it in the sidebar. Then, use the Restore button in the yellow bar at the top of the sheet. Notice, you can confirm the version date and time in the bar as well.
When you finish with the version history sheet, you can simply close it like any other Excel document.
Tip: Having trouble uploading your file? Look at these fixes for the “Upload Blocked” error for OneDrive on Windows.
Other Versions of Excel on Windows
If you have Office 2016 through 2021, you access Excel’s version history option a bit differently. With your workbook open, select File > History.
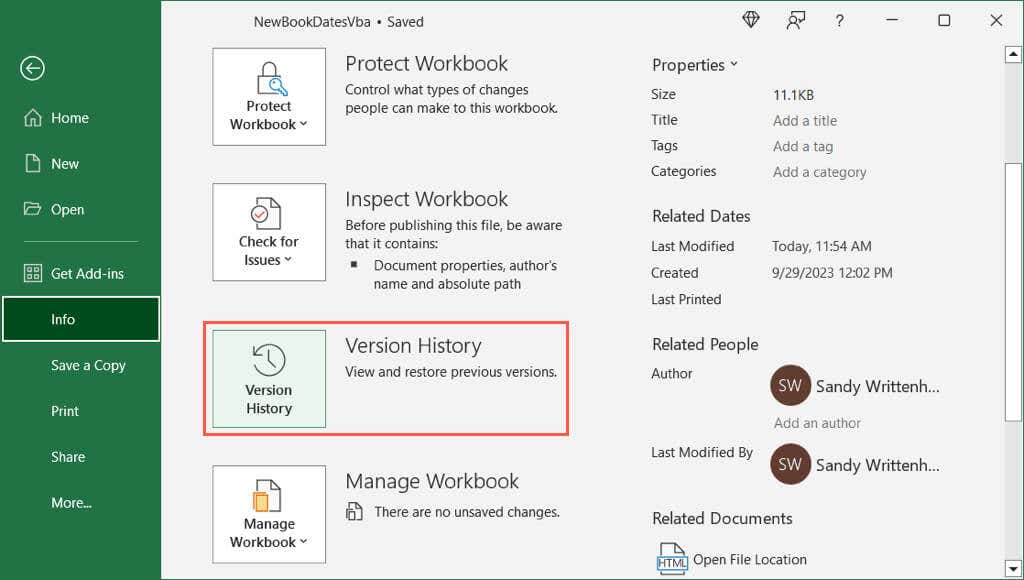
If you don’t see History in the File navigation, you could have a subscription version of Microsoft 365. In this case, choose File > Info and select Version History.
Version History in Excel on Mac
It’s just as easy to see the version history for an Excel file on Mac as it is on Windows.
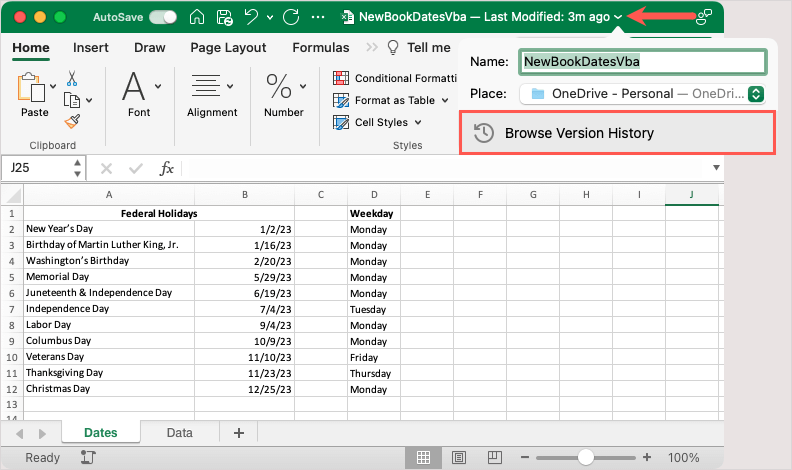
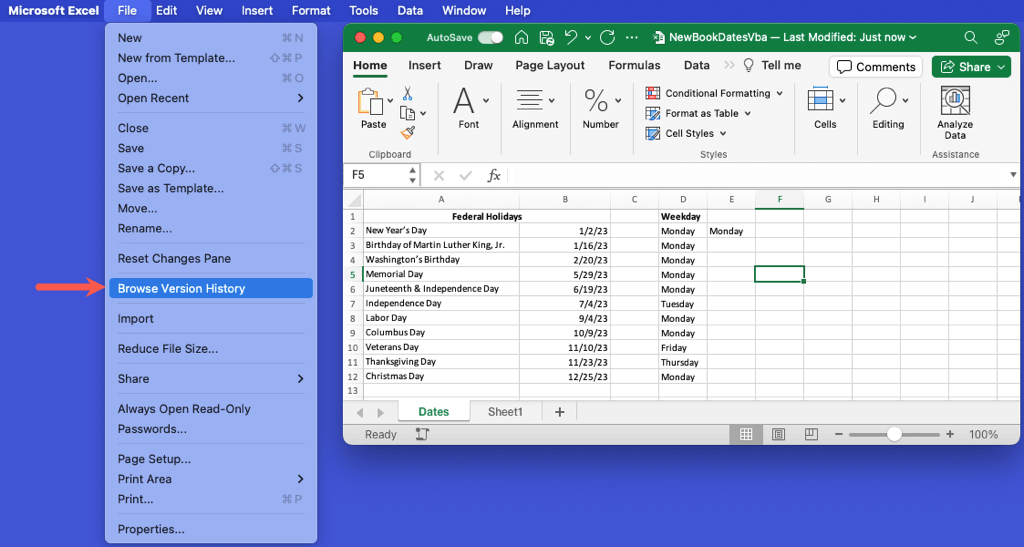
- With your workbook open, select the down arrow to the right of the file name at the top and choose Browse Version History.
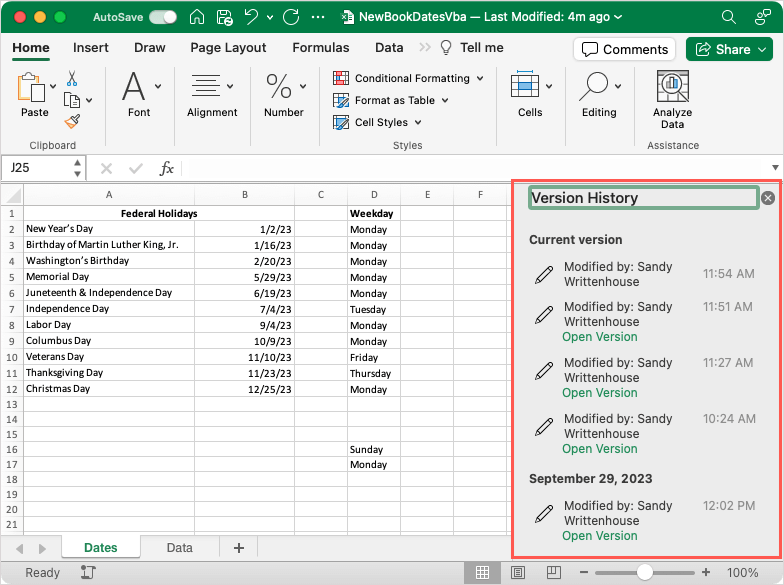
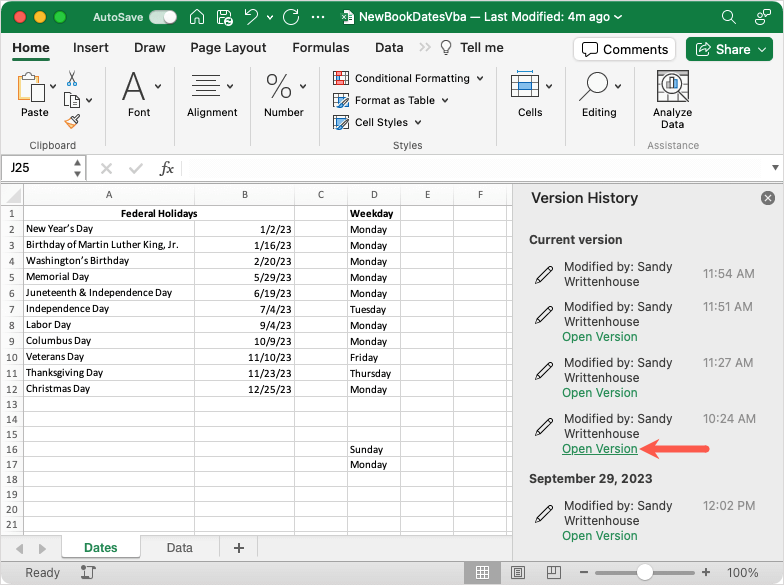
- You’ll see the version history in a sidebar on the right with all versions of the workbook and the date, time, and user of each change.
- To see a previous version or restore one, select Open Version in the sidebar below the one you want.
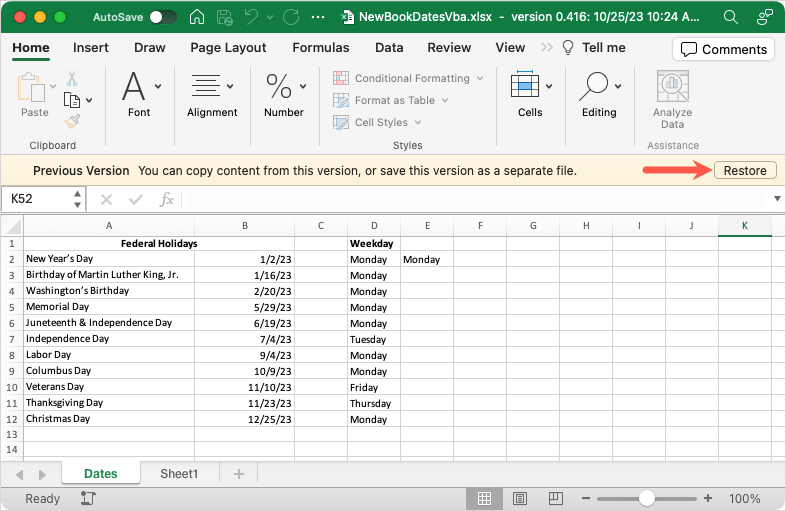
- When the workbook opens in a new window, you can check for the differences from the current version. To restore the version of the file, simply select Restore on the right side of the yellow bar at the top.
Simply close the version history sidebar using the X on the top right when you finish.
Tip: If you’re having trouble syncing OneDrive on your Mac, check out these fixes.
Other Versions of Excel on Mac
If you have an older version of Excel on Mac, or one other than Microsoft 365, you can just select File > Browse Version History.
Version History in Excel on the Web
Seeing the version history for a workbook in Excel, OneDrive, or SharePoint on the web is similar to that on Windows and Mac. Plus, you can restore a previous version just as easily.
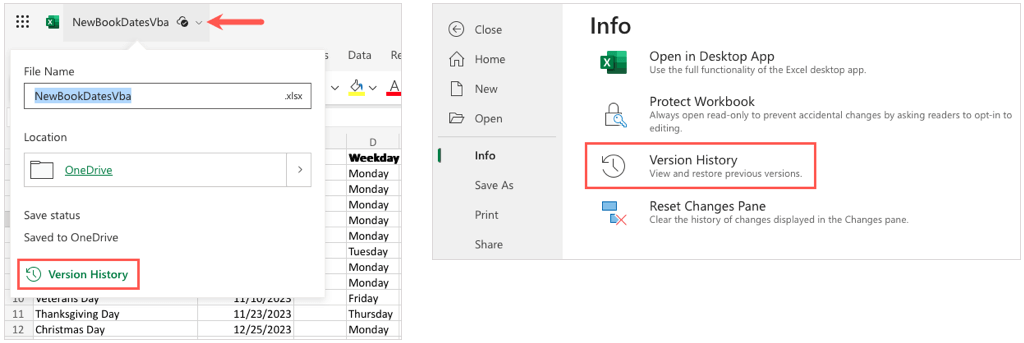
- Open the workbook, select the down arrow to the right of the file name on the top left, and pick Version History. Alternatively, select File > Info and pick Version History.
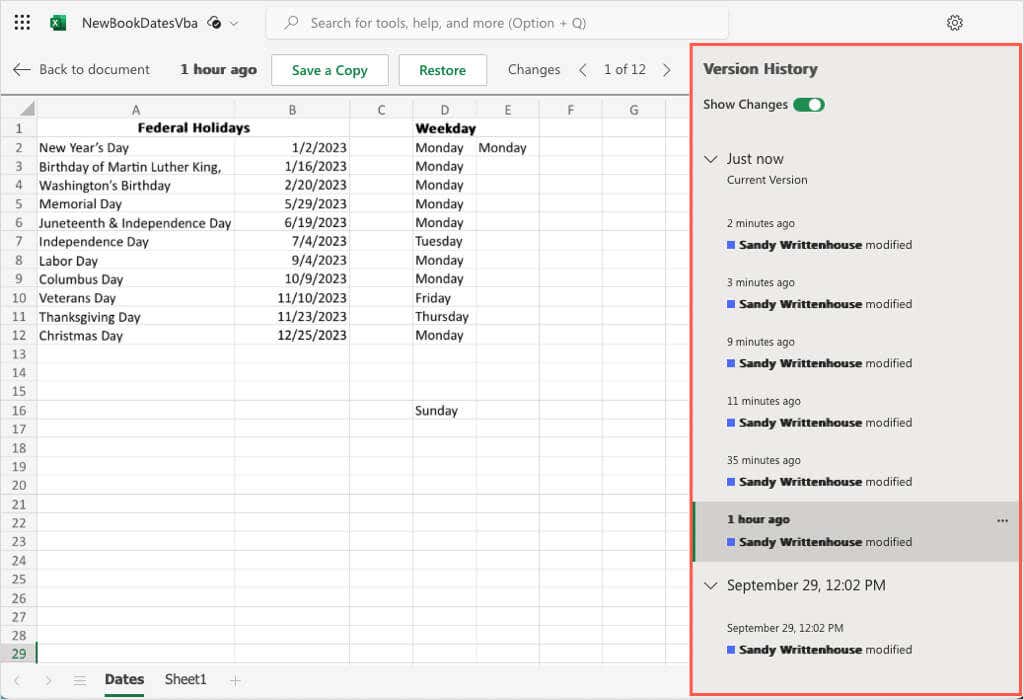
- You’ll see the workbook refresh with a new screen displaying the version history in a sidebar on the right. Here again, you can see each version, date and time, and user’s name.
- To see a specific version, use the arrow on the left to expand the section and then pick the version.
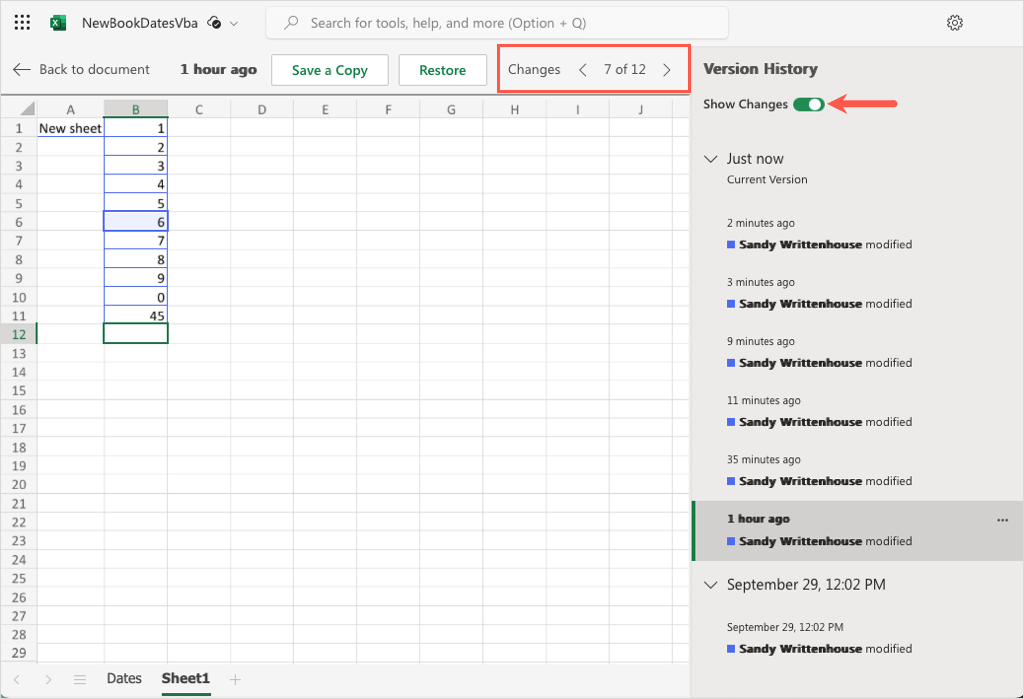
- You can also turn on the toggle at the top for Show Changes to see the edits highlighted in the workbook and use the arrows at the top of the sheet to move to each change.
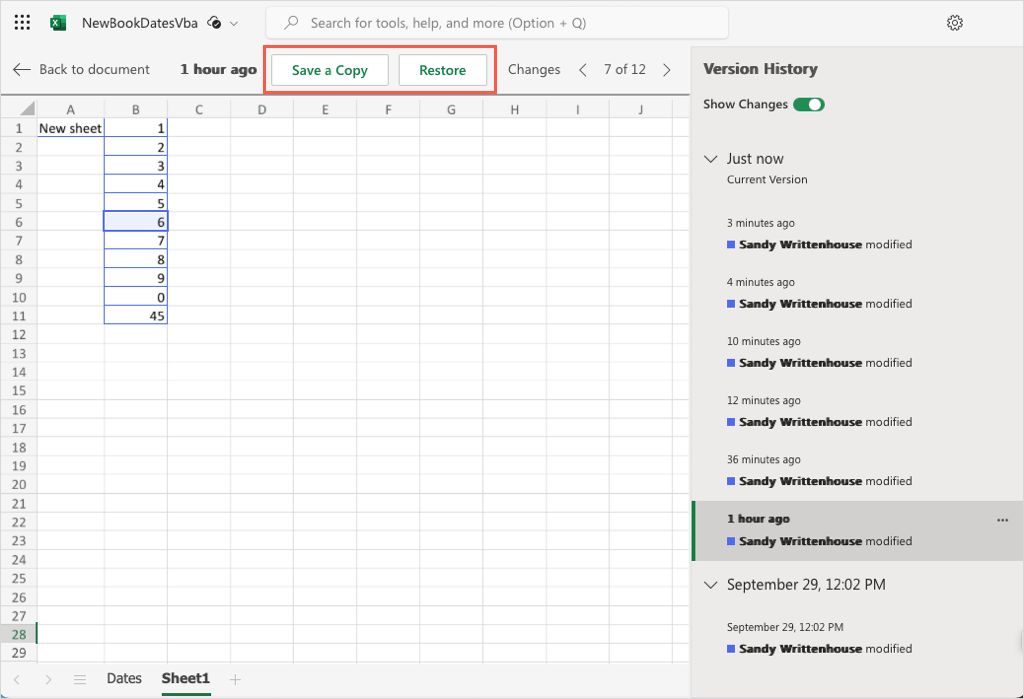
- To restore an earlier version, select it and then pick Restore at the top. Alternatively, you can choose Save a Copy to keep a new copy of the workbook.
When you finish viewing the version history, select Back to document on the top left of the sheet.
Excel Version History to the Rescue
From business financials to product inventory to household budgets, we use Microsoft Excel for a variety of purposes. Being able to see changes made by others or when we made an error in a sheet can be crucial. Thankfully, Excel’s version history is available to help view and restore previous versions.
Now that you know how to see version history in Excel, check out our tutorial for automatically backing up files to OneDrive or Google Drive to keep them safe from data loss.
Source : How to View Excel Files Version History (And Restore Previous Versions)
Comments
Post a Comment