How to Add and Show the Developer Tab in Microsoft Word
By using the Microsoft Office Developer tab in Word, you can add form controls, manage macros, view add-ins, protect a form, and more. If you want to enable these tools, here’s how to add the Developer tab in Word on both Windows and Mac.
How to Add the Developer Tab in Word on Windows
It takes only a minute to enable the Developer tab in Word on Windows.
- Select File > Options.
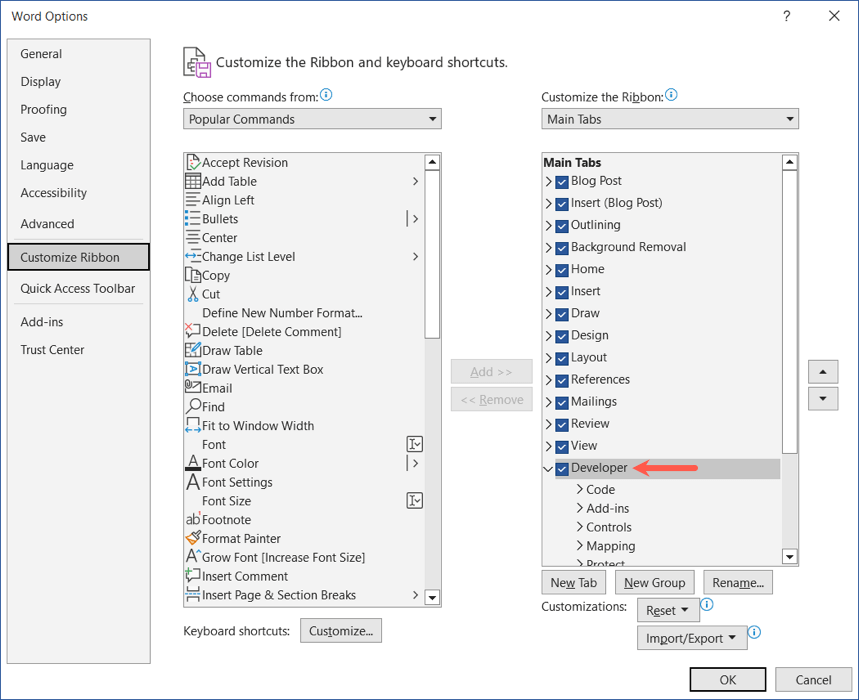
- Choose Customize Ribbon on the left, pick Main Tabs below Customize the Ribbon on the right, and do one of the following:
- If you see the Developer tab in the list on the right, check the box to enable it.
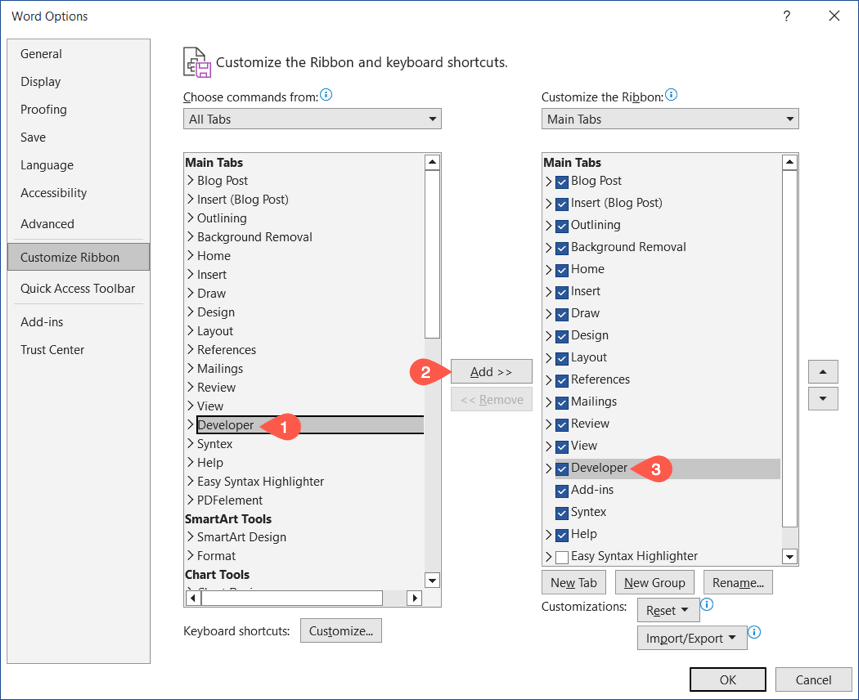
- If you don’t see the Developer tab on the right, select All Tabs in the Choose commands from drop-down menu on the left. Then, pick Developer and use the Add button to include it in the list. Check the box to enable it.
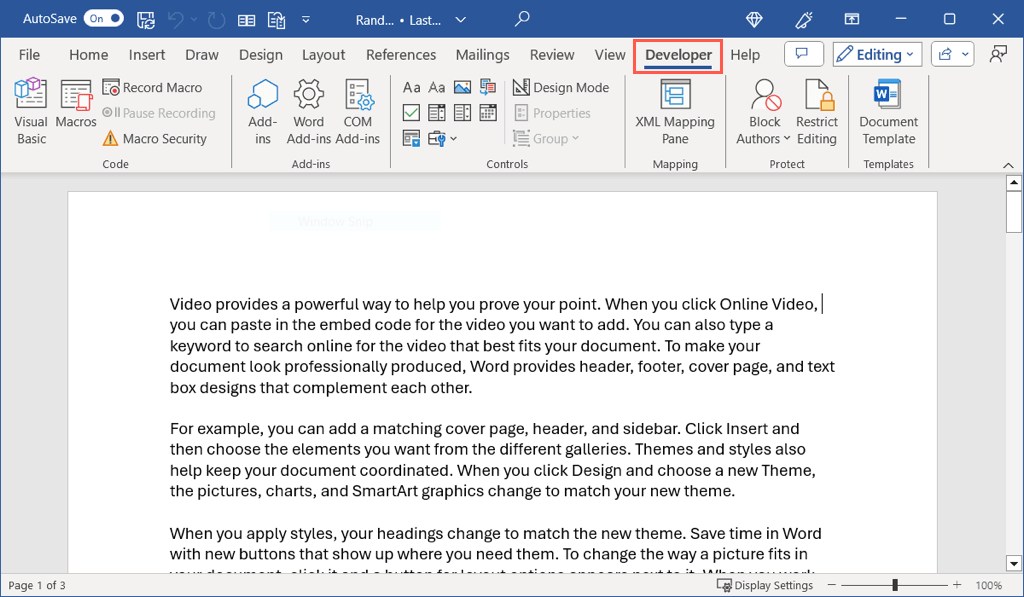
- Select OK when you finish, and you’ll see the Developer tab at the top of the Word window.
To hide the Developer tab later, follow steps 1 and 2 above. Then, uncheck the Developer option on the right and select OK in the Word Options dialog box.
How to Add the Developer Tab in Word on Mac
Like other Word settings, you take a slightly different route to enable the Developer tab on macOS.
- Select Microsoft Word > Preferences in the menu bar.
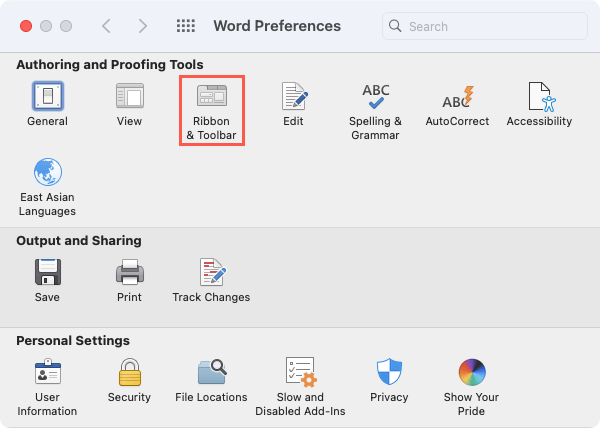
- Choose Ribbon & Toolbar.
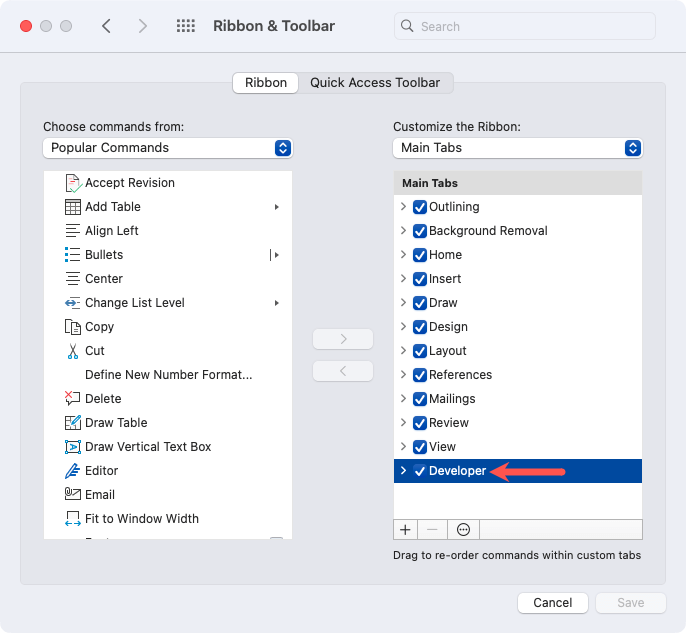
- Confirm that you’re on the Ribbon tab, pick Main Tabs below Customize the Ribbon on the right, and do one of the following:
- If you see the Developer tab in the list on the right, check the box to enable it.
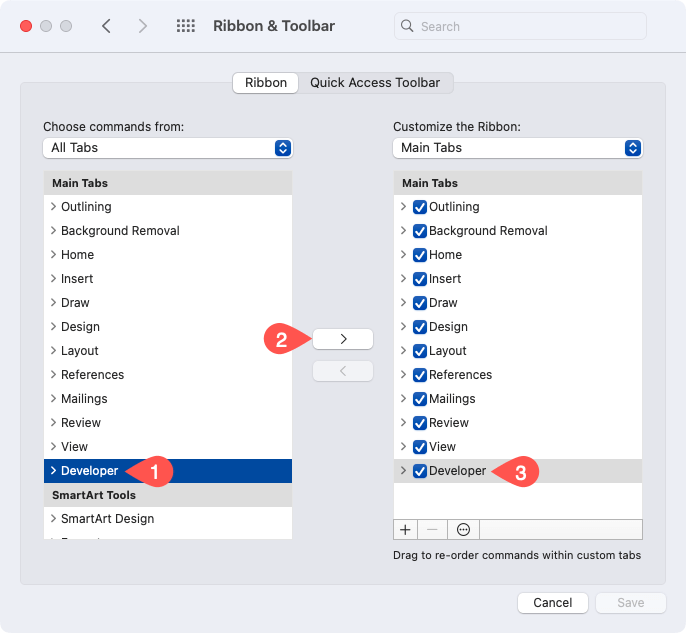
- If you don’t see the Developer tab on the right, select All Tabs in the Choose commands from drop-down menu on the top left. Then, pick Developer and use the right-pointing arrow to add it to the list. Check the box to enable it.
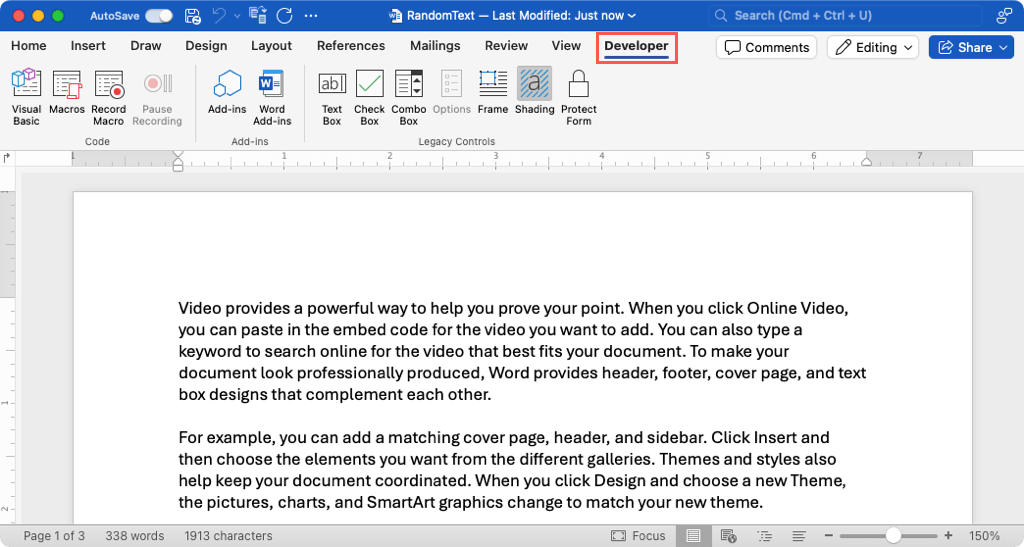
- Select Save when you finish, and you’ll see the Developer tab at the top of the Word window.
To hide the Developer tab later, follow steps 1 through 3 above. Then, uncheck the Developer option on the right and select Save in the Word Preferences dialog box.
Use the Developer Tab in Word
Once you add the Word Developer tab, you have a variety of options for macros, forms, and add-ins. Because the tools differ in Word on Windows and Mac, here is a list of the options for each by ribbon section.
Developer Tab Tools on Windows
Code: Open the Visual Basic tool, view macros, record or pause a macro, and see the macro security settings.
Add-ins: Get or see Word and COM add-ins.
Controls: Use form content controls like a text box, check box, and drop-down list, access legacy form and ActiveX controls, enter design mode and group form controls.
Mapping: Open and close the XML mapping pane.
Protect: Restrict editing and block or unblock authors.
Templates: Access Word document templates.
Developer Tab Tools on Mac
Code: Open the Visual Basic tool, view macros, and record or pause a macro.
Add-ins: Get or see Word add-ins.
Legacy Controls: Use form fields like a text box, check box, combo box, frame, or shading and protect the form.
For forms, macros, add-ins, and more, the Developer tab in Word gives you the tools you need. For more, look at how to create a fillable form in Word.
Source : How to Add and Show the Developer Tab in Microsoft Word


Comments
Post a Comment